This Dr. Axe content is medically reviewed or fact checked to ensure factually accurate information.
With strict editorial sourcing guidelines, we only link to academic research institutions, reputable media sites and, when research is available, medically peer-reviewed studies. Note that the numbers in parentheses (1, 2, etc.) are clickable links to these studies.
The information in our articles is NOT intended to replace a one-on-one relationship with a qualified health care professional and is not intended as medical advice.
This article is based on scientific evidence, written by experts and fact checked by our trained editorial staff. Note that the numbers in parentheses (1, 2, etc.) are clickable links to medically peer-reviewed studies.
Our team includes licensed nutritionists and dietitians, certified health education specialists, as well as certified strength and conditioning specialists, personal trainers and corrective exercise specialists. Our team aims to be not only thorough with its research, but also objective and unbiased.
The information in our articles is NOT intended to replace a one-on-one relationship with a qualified health care professional and is not intended as medical advice.
DIY Sugar Wax Recipe for Smooth Skin
July 29, 2021

Most of us start doing a little more grooming before heading to the beach or outdoors, along with when the weather gets colder and skin tends to get more irritated. The problem is, the idea of hot wax treatment is painful, and razor burn is embarrassing and stings. Don’t worry though — there’s another way to deal with unwanted hair: sugar wax.
Have you heard of sugar wax, or “sugaring”? While eating sugar seems to get all the heat these days, sugaring to remove hair has been used by Egyptian and Greek women for centuries.
Like other types of wax, sugar wax is applied to the skin and then removed, taking body hair along with it. You can also use it on your face.
How does it work? Let’s dive in and discuss how you can make your very own sugar wax recipe at home to get your skin feeling silky smooth.
What Is Sugar Wax?
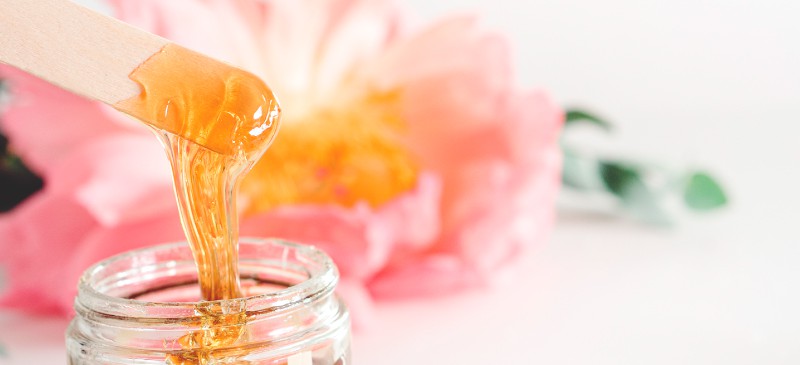
Sugar wax is a paste made from a combination of sugar, honey, water and lemon juice.
Is sugar wax painful? What’s great about this at-home waxing approach to body grooming is that when you remove it — unlike traditional waxing done at a salon — it doesn’t pull the top layer of the skin, which is what causes much of the discomfort of traditional waxing.
Instead, sugaring removes the hair because the sugar binds to the hair, not the skin. For this to work, your hair needs to be about a quarter inch long so the sugar can easily adhere to it.
While it still may be a bit uncomfortable, it should feel better than other methods of waxing.
Is sugaring better than waxing for your skin? If you have sensitive skin, this may be perfect for you and a better option than traditional waxing.
Additionally, the sugar acts as an exfoliant for the skin, adding even more softness. It may take a few rounds, but this is a great way to take care of your skin.
Another perk: Sugaring helps you avoid petroleum-based ingredients found in typical off-the-shelf hair removal products. It’s made of only sugar, water and lemon juice, meaning it’s simple to make, cheap, non-toxic and easy to clean up.
How long will your skin stay smooth? According to experts, sugar waxing is good for six to eight weeks of hair removal. The hair that grows back may also be softer than it originally was.
Sugaring Methods
In order to use sugar wax to remove body hair or hair on your face, there are two main methods: using either your fingers to remove the wax, or using pieces of cloth to remove the wax and hair.
Some people find that they get the best results when using their fingers to roll the sugar into a sticky ball, which can then be applied to the skin. However, others find the wax is too sticky and won’t come off easily without a cloth.
Using a cloth strip to remove the wax is a method that’s more like traditional waxing.
How to Make Sugar Wax
How do you make sugar wax? Start by putting the lemon juice and water in a medium-sized pan on the stove. Heat slowly. You can make sugar wax without lemon, but it’s recommend to include it if possible. Fresh lemon juice is great because it helps fight the bacteria that could cause breakouts, deeply nourishing the skin with vitamin C. It also acts as a natural exfoliator by removing dead skin cells that can clog your pores.
Now, add the honey and the sugar and stir. Put heat up to high. Using raw local honey helps prevent breakouts caused by bacteria. Raw honey can also help quicken healing time, should a rash occur. The sugar helps the skin obtain a supple and soft touch while moisturizing, and it also acts as a gentle exfoliant to the skin.
Once the mixture bubbles, reduce the heat to medium and continually stir (critical!) for another 5 minutes at least. When the mixture is smooth and golden in color, it should be done.
Be sure not to overcook it as it may cause it to harden, making it difficult to handle. Additionally, if it is too thin, it may be too hot. You ideally want it to reach about 250 degrees Fahrenheit.
The wax should have a tacky consistency and warm honey color. Once heated and well-blended, remove from heat. Test a spoonful of the mixture by placing it in the fridge. Let it cool and then check its consistency. If thick and tacky, then consider job well done! If not, put the pot back on the stove for a few more minutes at medium heat, again stirring the whole time.
If done, transfer to a heat-safe glass or stainless steel bowl and let cool for 30 minutes.
The amount of wax you need depends on how much area you are covering. Consider trying this recipe first, which should yield enough for one or two legs — depending on how much hair you’re removing.
If you have any left over, refrigerate in a glass, airtight container for up to four or five weeks, then reheat when ready to use.
How to Prep the Skin
Now that you know how to make sugar wax, let’s talk about prepping your skin.
You want your hair to be about a 1/4- to 1/2-inch long. For the best results, while the sugar wax mixture is cooling, wash the area you want to wax. Even better, exfoliate using a sugar scrub. Then dry the skin very well. Also make sure the skin is free of lotion or makeup.
You may want to do a patch test first to make sure it is okay for your skin. If you notice any unusual sensitivity, stop.
However, since these ingredients are pure, it should be a treatment your skin will love.
How to Use
If you’re using your hands to remove the wax:
- You need to scoop out a chunk of wax while it’s warm and knead it by stretching it between your hands. (Some describe it as being like taffy.) You want to stretch and fold it until it turns opaque and can be rolled into a ball.
- Press the ball of sugar wax against your skin, and use your fingers to push the ball into your skin and up against the direction of hair growth. Stretch the wax across the area of skin you’re targeting, at about 1/4 inch thickness.
- Next, holding the skin taut, QUICKLY pull sugar wax away from your skin AGAINST the direction of the hair growth and as parallel as possible with your body.
- Reform the ball and keep going until it’s not sticky anymore (3–5 uses), then use a newly formed wax ball.
If you want to use a cloth to remove the wax:
- First use a popsicle stick or a small plastic spatula to spread a thin, even coating of the sugar wax on a small area of skin. Make sure to apply it in the opposite direction of hair growth. (Before doing this, do a small patch test to make sure the wax does not cause unusual irritation.)
- Next, place a strip of the cotton fabric on the area and smooth it down by pressing and rubbing it. Allow it to cool on the skin.
- Then, holding the skin taut, very quickly pull the cloth in the direction of hair growth. It’s also possible to apply and remove the wax without using the cloth strips. Repeat if needed.
Risks and Side Effects
Is sugar wax safe? It’s safe for most skin types if you follow directions and are careful not to burn yourself.
Note that this recipe works best for softer hair, such as hair on the legs, back and chest.
Most experts caution against sugar waxing areas, such as the underarms or bikini line, where the hair is more coarse. Make sure to test a small area first if you choose to sugar wax in those areas.
The eyebrows may be a challenging area as well. The upper lip may be OK, but please test first.
Regardless, if you are uncertain, work with a professional to perform any waxing, particularly if you’ve had bad reactions in the past.
After Care
When you are done, rinse the area in warm water, and use a cloth to gently remove any residual sugar from your skin. Apply a natural moisturizer, and be sure to avoid any additional exfoliation, hot water and the sauna for a couple of days to allow the skin to heal from the hair removal process.
Wait 24 hours for any hot showers, repetitive motion activities (e.g., running), or soothing ointments or serums. After about 48 hours you can exfoliate your skin if you’d like.
Now, you are ready for the season with soft, smooth skin.
Print
DIY Sugar Wax Recipe
- Total Time: 50 min
- Yield: 1–3 applications 1x
Description
Have you heard of sugar wax, or “sugaring”? While eating sugar seems to get all the heat these days, sugaring to remove hair has been used by Egyptian and Greek women for centuries. Forget the hot wax treatment and instead use this DIY sugar wax!
Ingredients
- ⅓ cup fresh lemon juice (recipe will work without but better for skin to include)
- ⅓ cup water
- 2 cups organic cane sugar
- 2 tablespoons honey
Supplies
- Small pan
- Soft towel
- Popsicle stick or small plastic spatula
- Small pieces of thin cotton fabric (about 1 inch by 3 inches each)
- Airtight glass container for storage of leftover wax
Instructions
Mixture
- Put the lemon juice and water in a medium-sized pan on the stove at medium heat for a few minutes.
- Add the sugar and honey and stir with a wooden spoon. Turn up the heat to high.
- When the mixture gets bubbly, reduce the heat back to medium and continue to stir. IMPORTANT: You must continue to stir, otherwise the mixture will harden and become useless.
- For another 5 minutes or so, cook at medium heat, stirring constantly. When the mixture becomes smooth and golden in color, it’s considered done.
- Remove from the heat.
- Test a spoonful of the mixture by placing it in the fridge. Let it cool and then check its consistency. If thick and tacky, then consider job well done! If not, put the pot back on the stove for a few more minutes at medium heat, again stirring the whole time.
- If the mixture is deemed ready, let the pot cool for 30 minutes.
- Transfer to a heat-safe glass or stainless steel bowl.
How to Use
- While the sugar wax mixture is cooling, gently exfoliate (use this DIY sugar scrub) the area you want to wax — legs, bikini area, back, underarms, even upper lip — and dry it very well. Make sure the skin is free of lotion or makeup.
- You may want to do a patch test first to make sure it is OK for your skin. If you notice any unusual sensitivity, stop.
- Using a wooden spoon or your hands, scoop out a small chunk of wax while it’s warm and roll it into a ball in your hands. (Some describe it as being like taffy.)
- Press the ball of sugar wax against your skin, and use your fingers to push the ball into your skin and up against the direction of hair growth. Stretch the wax across the area of skin you’re targeting, at about ¼-inch thickness. (You can also use popsicle sticks or waxing strips to apply the sugar wax.)
- Next, holding the skin taut, QUICKLY pull sugar wax away from your skin AGAINST the direction of the hair growth and as parallel as possible with your body.
- Reform the ball and keep going until it’s not sticky anymore, which is usually 3 to 5 times.
- When you are done, rinse the area in warm water, and use a cloth to gently remove any residual sugar from your skin. Apply a natural moisturizer, and be sure to avoid any additional exfoliation, hot water and the sauna for a couple of days to allow the skin to heal from the hair removal process.
- Wait 24 hours for any hot showers, repetitive motion activities (e.g., running), or soothing ointments or serums.
Notes
The amount of wax you need depends on how much area you are covering. Consider trying this recipe first, which should yield enough for one or two legs — depending on how much hair you’re removing.
If you have any left over, refrigerate in an airtight container for up to four or five weeks, then reheat when ready to use.
- Prep Time: 15 min
Comments
Please keep comments under 200 characters.


Tried this and still currently failing. Been trying to get it to thicken up for almost an hour and it’s not working. :( send help
One of the most appealing aspects of sugar waxing (https://www.earthandskin.com.au/) is its simplicity and use of natural ingredients. Traditional waxing products often contain chemicals and resins that can be harsh on the skin.
Sugar wax should be pulled off WITH the direction of hair growth not AGAINST.
You put it on your skin against the direction of growth and pull away with the direction of growth.
I came to this link via a site about how to handle facial hair. Facial hair is not mentioned at all here, though hair on other parts of the body is.
Mine worked fine. I make jelly and candy so it’s a lot like that. I used a candy thermometer to bring it to just under 250 at the line that says “firm ball” while constantly stirring. I raised and lowered the temp when it was foaming, just like jelly and candy. Once it cooled enough I put it in the refrigerator. It rolls up into a ball just fine.
Don’t do it when you are in a hurry and don’t get in a hurry.
Great staff I am interested in learning more on how to detox and take care of my entire body but my skin is very dry and it is not firm so I will be glad if Dr Axe can assist me on how to keep my skin moisture and firm
You’re supposed to let it cool. The recipe has nothing to do with your burns. The lack of common sense does.
Hey so is is bad or dangerous to do like waxing in areas with cuts, acne, or moles?
if you have a cute it’s recommended to wait until your cuts or acne are healed, but moles are ok.
It’s all about temperature and cooking over medium heat
thanks for the heads up bsf!
Wow..very well explained..
I have a query..
What can we substitute lemon with???
apple cider vinegar
Help! It’s not getting thick. Just liquid
Put back on the stovetop. :)
can we just talk about how the woman on the image for sure got all that sugar wax underneath her nails, but besides the point,,, imma try this recipe 😌
This was extremely helpful! Thank you!
If I have left over wax in the fridge how do I reheat it.
DO NOT HEAT IN MICROWAVE. use your hands to need it or put it near something warm
Can you give me a temperature when done? Its like making toffee … I am wasting ingredients and not getting the right consistency. You can’t go by color when it is boiling… it is a guessing game.. please help!
Heat to around 245-250F. Then let it cool. Any temperature past 140 will severely burn your skin. I would test it out between 120-130 when waxing.
Hi can I use an orange instead of lemon
I use apple cider vinegar in place of lemon it has the same acidic, antioxidants, and vitamin c.
Yes, it should still work well.
You can use jeans strips in place of cotton cloth or paper strip, It will be less painful while waxing. Keep a container will warm water near you and when you are done with the strip throw it in the warm water. Later on you can rinse them and wash them in washing machine. they can be reused again and again a lot of times. it saves money and are also environment friendly because instead of throwing your old jeans you will be repurposing them.
Love this method of hair removal, which I was taught whilst working in Turkey over 25 yrs ago. Now to have a good recipe to follow is fabulous and also Eimo, thank you for sharing. I am so used to doing this at home as I am constantly traveling on a yacht, and it is so much cheaper and easier to do it at home! Now I am off to buy some raw honey as I have the other organic ingredients …
Big thanks to Dr. Axe, I appreciate the effort and the time you invest in these free information. Especially the knowledge of essentials oils that have helped me a lot with different issues concerning my hair and skin. Thanks a lot and God bless you.
Thank you Eimo for the kind words. I will pass them on to Dr. Axe!
I am from Egypt and we use this sugar paste always for hair removal. But we either use honey or sugar. Sugar amount should be double the amount of water you add. When it starts to cook add the lemon juice I always add a half lemon to one whole lemon. Lemon will keep its elasticity for a longer time. Never let the paste change in color while cooking otherwise it will be too hard to handle. Instead, you can check if the paste ready or not during cooking by dropping a few drops on a cold and slightly wet surface, it should form a ball that will be easy to remove from one finger to another. Make sure that while chicking the bowl is removed from the stove. Pour it into a cold and slightly wet surface and keep an eye on it while trying to gather the poured mixture together until it’s slightly cool. Be careful not to burn yourself because in the liquid form it can adhere to the skin and cause burning damage and scars. Knead it for a while before using it. Kneading will whitten its color and made it more flexible and indeed you won’t need a cotton stip or anything to pull it out. When refrigerated, before using it you can leave it in a warm place nearby the heater and then try to get warm between your hands. You should never reheat otherwise it will harden. If you slightly overcooked it and it’s hard to handle, then wet your fingertips and kneed it for a few seconds
Thank you! I will definitely try this. I have a question so could I use it if it’s still warm after kneading it?
I should try that because it might be easier then using a cotton strip. With the strip you have to pull it off then it might might hurt.now with the recipe you gave can you use it on the binki or underarm areas?
Yes you can, but just like any other wax be sure to test it on your skin and to be careful not to burn yourself
Can i use vinegar instead of lemon
As a woman that has used this recipe past down from generations, do you have any trouble using it in bikini areas or armpits?
noo i always use it on armpits and bikini line
Apple cider vinegar!
Do you mind sharing your full recipe?
Good 😊 after reading…I hope it will work…thank you 😊
How long does this method of hair removal inhibit the regrowth of hair?
I have always been advised to cut off hairs and not “pull” them out, or they will grow back with a thicker diameter.