This Dr. Axe content is medically reviewed or fact checked to ensure factually accurate information.
With strict editorial sourcing guidelines, we only link to academic research institutions, reputable media sites and, when research is available, medically peer-reviewed studies. Note that the numbers in parentheses (1, 2, etc.) are clickable links to these studies.
The information in our articles is NOT intended to replace a one-on-one relationship with a qualified health care professional and is not intended as medical advice.
This article is based on scientific evidence, written by experts and fact checked by our trained editorial staff. Note that the numbers in parentheses (1, 2, etc.) are clickable links to medically peer-reviewed studies.
Our team includes licensed nutritionists and dietitians, certified health education specialists, as well as certified strength and conditioning specialists, personal trainers and corrective exercise specialists. Our team aims to be not only thorough with its research, but also objective and unbiased.
The information in our articles is NOT intended to replace a one-on-one relationship with a qualified health care professional and is not intended as medical advice.
DIY Setting Powder
January 7, 2018
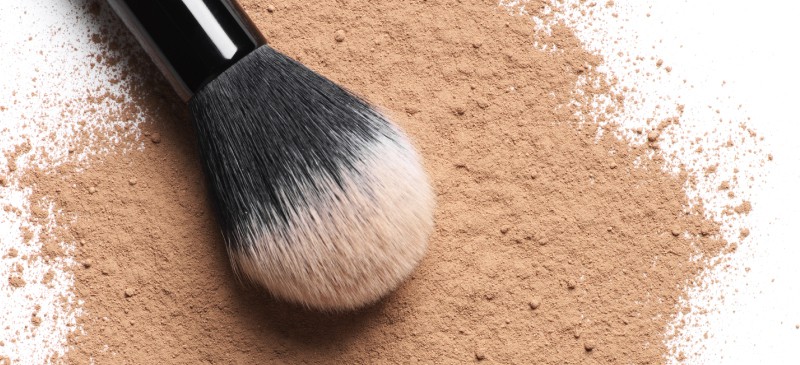
If you wear makeup, you may want to consider using a setting powder. A setting powder gives your makeup a smooth finish by helping to lock foundation into place while reducing cracks that can come across as wrinkles. However, you need to make sure you are using your setting powder in the right way and that you are using a powder with quality ingredients that actually benefit the skin.
I do not recommend baking soda or cornstarch for face powder. Some have asked, “Can I use flour as setting powder?” The answer is no. Flour simply does not have the softness that allows for a smooth appearance. Arrowroot powder is my recommendation. Now, let’s jump into making your very own DIY setting powder. It is super-easy and perfect with my foundation. Consider making my DIY eyeshadow, mascara and eyeliner as well!
Now, you want to make sure you know the difference in setting powders. There are lots of mineral powders out there that are great, but they are intended to replace medium-coverage foundation. So, unless you want a full-coverage look — meaning a heavy and possibly a caked-on appearance, I would avoid applying mineral setting powder on top of foundation.
There are pressed powders and loose powders. The best setting powders are usually loose and either translucent or colored. We have been reviewing loose powders, but pressed powders are OK, but they typically add a bit more coverage due to the binders they contain. Translucent powders simply help set the foundation so that it stays in place all day, minimizes pores and fine lines, and absorbs oils so that you eliminate an oily skin appearance. On the other hand, if you want a bit more coverage, go for a tinted version. The tint can vary.
Read on for my recipe to make your own DIY setting powder using all-natural ingredients, customized by you to match your skin tone.
DIY Setting Powder
5–6 ounces
5 minutes to make
Ingredients:
½ cup arrowroot powder
1–3 teaspoons cacao powder (Add in a little at a time until you reach the desired shade that is similar to your skin tone.)
1–3 teaspoons nutmeg (Add in a little at a time until you reach the desired shade that is similar to your skin tone.)
2 drops geranium essential oil
To make, place the arrowroot powder in a mixing bowl. You can use a coffee grinder to do your blending if you prefer. Arrowroot powder is what makes this DIY setting powder silky smooth — which translates to silky-smooth skin! Arrowroot is a natural ingredient that doesn’t contain harsh chemicals, plus high heat is not used in the extraction process. Arrowroot powder actually has antiseptic properties too, making it a great choice for the face to help minimize bacterial growth that can cause flare-ups.
Now, add the cacao powder and the nutmeg, a little at a time. Both of these ingredients help to create a translucent effect, plus to find a color close to your natural skin tone. Cacao contains antioxidants, too, which are great for the skin. Nutmeg not only smells wonderful, but it’s also antibacterial. (1)
Lastly, add 2 drops of geranium essential oil to the mixture. Geranium oil is amazing for your face, offering radiant skin and inflammation-fighting benefits. Blend all ingredients together. Then, store the finished product into a tight-fitting container. Use glass if you have it since it does not leach chemicals. That’s it — you have now made your very own DIY setting powder!
How to Use Setting Powder
First, make sure your foundation has been smoothly and evenly applied. Do not apply the powder until your foundation has completely dried. Otherwise, you will cause a caked-on effect, which is not the look you want to achieve!
Once your foundation has dried, apply the powder evenly using a clean brush. You can use it without foundation, too for, a feather-light finish and fresh look. Just keep your brushes clean to avoid contamination.
DIY Setting Powder
Ingredients:
- ½ cup arrowroot powder
- 1–3 teaspoons cacao powder (Add in a little at a time until you reach the desired shade that is similar to your skin tone.)
- 1–3 teaspoons nutmeg (Add in a little at a time until you reach the desired shade that is similar to your skin tone.)
- 2 drops geranium essential oil
Directions:
- Blend all ingredients together.
- Store in a container with a tight-fitting lid.
- Apply evenly to clean skin or on top of foundation once dry.
Comments
Please keep comments under 200 characters.






This recipe creates such a beautiful product. It smells so good, doesn’t settle in my fine lines and wrinkles and gives a flawless finish.. I LOVE, Love, Love this setting powder! Thank you Dr. Axe.
Hello!
I’ve given this a try and I’m not achieving a flesh tone at all similar to what you have pictured above. Any suggestions?
Dr A, love your stuff. This is a great recipe for face foundation powder… If I might add… for someone who has issue putting carbs onto or in their body (or any product that might raise blood sugar), I’ve substituted Arrowroot with Guar gum. All set to give it a go! Thanks for all you do.
Guar gum is made from a bacteria, that is used as a thickening agents in food. Many doctors was against the FDA approving it for use without ANY clinical research.
In short, I don’t recommend putting it on your face. (And avoid eating and using products with it).
Which brands of the following do you recommend: essential and other oils such as coconut and jojoba, shea and cupuacu butters, cacao, and arrowroot? I use YL for most of my essential oils but a few they do not carry such as rosehip.
I love Cliganic Organic Jojoba Oil (zero reactions when used as a face oil) and both Plant Therapy and Alaffia shea butters. I find these on Amazon or in Sprouts or While Foods. For cacao powder I use Navitas Organic that is at Whole Foods. Best I’ve ever used. For arrowroot I recommend Bob’s Red Mill Organic. For coconut oil I use Sprouts’ store brand organic virgin coconut oil. Rosehip oil is something you can just pick up at any health food store. I tried a brand at Sprouts, but my skin didn’t like it. Jojoba it’s closest to our natural sebum and Cliganic Organic Jojoba is my ride or die. It mixed with shea butter (1 part jojoba, 3 parts shea) makes a fab hand cream and you can use it 1:1 for treating heels or dry skin on your body.
Thanks to the author for confirming I can use arrowroot to set my eyeliner and shadow. Hooded, oily eyes are so hard when using only natural products like my fave Ere Perez Jojoba Eye Pencil (clean beauty brand) to line my eyes. This will help set it so I’m not dishing out 40 something for RMS Unpowder!
Instead of nutmeg, I don’t like its smell, can I use cinnamon?
I love your website. Thank you so much for the helpful tips and natural alternatives. Much appreciated.
Why don’t you recommend cornstarch for the face? I am making my own bronzer with cornstarch, cocao powder, nutmeg and cinnamon and found it irritated my neck the first time so curious if there is something to that.
I make and use this homemade bronzer with cornstarch, cocao Powder, cinnamon and nutmg snd have no bad reaction or irritation. Makes my face feel soft snd sun kissed color and can adjust color by adding more or less of cocoa powder or cinnamon. Some people are very sensitive to cinnamon on their face! Love it! Next want to try making the. DIY Nail Polish Remover, my nails are very weak and breaking, need help, any suggestions?
Hi, Doreen: this post will be a little long, but hopefully you’ll find something useful in here. :D
I have never made a polish remover that didn’t contain acetone, but here are some professional and upscale methods that I have used for clients with weak, peeling, chipping, brittle, or dry nails that have served me well as a nail tech:
You can add 10% water, and, optionally, a drop or two of essential oil of lemon or orange to your remover. (Gently shake to mix). Warm polish remover is more effective, and the pro way to do accomplish this is to gently loosen the cap on the bottle, hold the bottle by the neck, and gently swish the polish in its’ bottle while running hot water over the bottom half of the bottle for a minute our two. Wipe bottle dry.
Actual use of polish remover: to keep from scrubbing the natural oils out of your nails while removing polish, put some remover on a cotton ball, lay it on your polished nail so that the wet ball touches the entire nail; leave it in place for at least 30 seconds, longer if you have many layers of polish on; and almost all of the polish should just wipe cleanly off in one go when you just pull the cotton ball down the nail and off the tip.
Wash hands with mild cleanser & nail brush in warm water so that the polish remover is
off & out from under the nails.
Next: Prep your nails for manicure service:
Get a really nice, warm bowl of water in which to soak your hands. If they need extra TCL, soften the water with a spoonful or two of baking soda, and a spoonful of oat flour (dissolve into manicure basin). Massage some coconut oil into your hands and nails, and then
Give your nails & fingers a nice, warm soak for a full 20 minutes. The warm water will expand your nails so that your enhancements or polishes dry to fit an expanded nail… it keeps the polish from shrinking more than it normally would, so that it is less likely to chip or peel off once the nail bed dried back to its’ normal size. It will also cause some of the oil to absorb into the nail beds, so that the hands & nails will be less dry and the nails less brittle.
Give them another warm wash with mild soap & nail brush as before. Procede with your manicure.
Consider using a base coat with rubberizers to impart flexibility; avoid nail-hardening formulae, because these will only cause the nails to become more brittle. When u apply it, gently brush a little underneath the free edges and along the very end of the tips to seal them up. This should help minimize splitting & peeling.
If you can prevent any polish or treatment from landing on your cuticle, your manicure ought to last longer. Invest in a packet of those oval-shaped tapes that are intended to hold corn plasters in place if you need to. You can easily position those on your fingers before applying product to your nails so that the polish can’t end up where you don’t want it to. Once the polish is good and dry, any little smudges will peel off with the tapes. :D
My only other tips are: tap your fingers (but not the nails) when it won’t bug other people (improve circulation), massage a little oil into your nails at night & leave it on all night; and plan your week’s work wardrobe so that you start the week wearing the lightest colour of polish, and end with the darkest so that you can just apply the next darker colour right over the 1st polish so that you can go without having to remove polish for a week or two. Reapply a thin layer of top coat every couple days to keeps those fragile tips sealed nicely. Oh: avoid polish-drying drops or spray if you can; they are a bit of a scam in my mind… the client leaves happy with dry nails, but they cause extra product shrinking so that the manicure fails faster, and you have to return more frequently for another manicure.
Try a non toxic nail polish by SOPHi.
They don’t contain the chemicals in regular nail polish that cause brittle nails in the first place. Also they have a non acetone remover to go with it. I have used them and i really like them. They are as durable as conventional polish at the salon.
Visit: http://levisagenaturel.blogspot.com/p/new-official-site.html?m=1
likes thi notify messages
Please send me gluten free recipes.thakks