This Dr. Axe content is medically reviewed or fact checked to ensure factually accurate information.
With strict editorial sourcing guidelines, we only link to academic research institutions, reputable media sites and, when research is available, medically peer-reviewed studies. Note that the numbers in parentheses (1, 2, etc.) are clickable links to these studies.
The information in our articles is NOT intended to replace a one-on-one relationship with a qualified health care professional and is not intended as medical advice.
This article is based on scientific evidence, written by experts and fact checked by our trained editorial staff. Note that the numbers in parentheses (1, 2, etc.) are clickable links to medically peer-reviewed studies.
Our team includes licensed nutritionists and dietitians, certified health education specialists, as well as certified strength and conditioning specialists, personal trainers and corrective exercise specialists. Our team aims to be not only thorough with its research, but also objective and unbiased.
The information in our articles is NOT intended to replace a one-on-one relationship with a qualified health care professional and is not intended as medical advice.
How to Season Cast Iron (+ How to Clean Cast Iron)
May 12, 2018
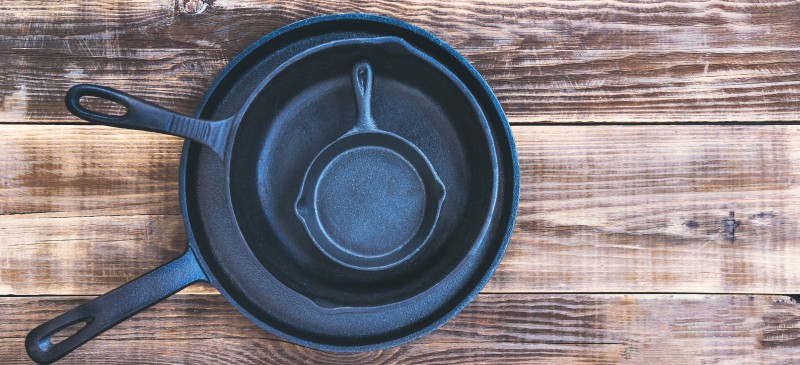
If you don’t like cast iron cookware it may be because you’re not sure how to season cast iron and care for it properly (don’t worry, it is easy if you know how). Well-seasoned and properly cared for, cast iron cookware develops a natural nonstick finish and lasts for decades and decades. And cast iron spreads heat well, making for even cooking. Plus, cooking in cast iron is healthy for you and your family. Unlike many modern nonstick surfaces that add toxins to your food and indoor air, cast iron releases no harmful substances, and, even better, eating food cooked in cast iron skillets (and other shapes too) helps prevent iron deficiency. Read on to find out how to season cast iron.
How to Prepare to Season Cast Iron
Before we describe how to season cast iron the first time, take a few minutes to prepare your new or rescued pan. Even “pre-seasoned” cast iron skillets benefit from some extra preparation and home seasoning.
Wash your new cast iron skillet in hot soapy water, rinse it well, and put it upside down in the oven, set to 200 degrees F or less, and allow it to dry completely. Once it is a dull gray color all over, move onto the actual seasoning process (below).
If you are working on a pre-owned cast iron pan, remove any rust or cooked-on residue with steel wool or a wire brush. For really stubborn greasy residues, try covering them with a natural oven cleaner and letting it do most of the heavy work. Wear rubber gloves and consider placing your cast iron skillet in the oven while the oven cleaner works to keep it out of harm’s way. You may need to leave the oven cleaner on for up to several days for really icky pans.
Now that your skillet is prepared, it’s time to learn how to season cast iron …

How to Season
Once you have prepared your pan, it’s time to season it. When you season cast iron you create “seasoning”: a shiny, incredibly hard and slippery, dull-black patina of oils and fats that are tightly locked into the natural pores of the metal.
There are dozens of strongly held views on the “right” way to season cast iron, but they all boil down to this: Apply a very, very thin coating of oil to all surfaces of the item, including the underside, handle, and sides of the skillet. Ideally, I recommend using flaxseed oil or coconut oil, but you can also use vegetable oil for this purpose. Wipe off any excess, then bake it in a moderate (300 degrees F to 350 degrees F) oven for a few hours, and allow it to cool. Repeat a few times until the surface starts to turn an even or speckled brown. It is simple to season cast iron right, but you have to be patient. Piling on a thick coating and baking once can create a sticky, gooey mess and you’ll have to start over.
If it sounds daunting or you are in a hurry, just give your new cast iron skillet a quick rinse with warm soapy water and start sautéing and frying in it. Whatever oils and fats you’re cooking with will start the conditioning process. Hold off on using the skillet for cooking watery or acidic foods until the pan starts developing a nice, smooth brown coating on the inside. It’s that easy; now you know how to season cast iron!
Cooking in Cast Iron
Now that you know how to season cast iron it’s easy to learn to cook with a cast iron skillet. You can cook anything you want in cast iron once it has developed a smooth, hard coat of seasoning. Here are a few tips:
Preheat
Once hot, cast iron provides an even heat across the entire cooking surface. But while a skillet is heating up, the heat is very uneven, resulting in hot spots and unevenly cooked food. To avoid this, always preheat your cast iron skillet on medium-low for at least three minutes. To test if your skillet is ready to go, flick a few drops of water into it. The water will sizzle and dance once the pan is hot.
Oil
Unless what you are cooking has a lot of natural fat in it already, add a tiny bit of oil or fat to your skillet just before you put your food into it.
Tools
Skip the special non-scratching cooking tools! The best tools to use in a cast iron skillet are a stainless steel spatula with a straight front edge and curved corners, a stainless steel spoon, and a stainless steel coil whisk. Over time, the gentle scraping action of metal on metal will slowly polish the surface of the cast iron, making it smoother and more nonstick.
How Nonstick Is Cast Iron?
A newly-made cast iron skillet will never be quite as nonstick as a new Teflon pan. Why? Cookware cast since the 1950s has a “pebbled” cooking surface. On the other hand, a year or a decade later, your cast iron won’t be chipped or scratched, nor will it have been releasing toxins into your food and air. Keep experimenting, and you will soon master the art of cooking in cast iron. And, over time, the inside of your cast iron skillet will continue to darken and become more nonstick.
A well-used and seasoned vintage cast iron skillet can be incredibly nonstick. This is because vintage cookware was polished smooth after casting and it has also been polished further by decades of scraping with metal tools.
While you can cook most foods successfully on the pebbled surface of a well-seasoned modern cast iron skillet, you may yearn for at least one cast iron skillet that is smooth as silk for cooking eggs and other foods that tend to stick. Shop around for a second-hand cast iron skillet. Or, if you’re willing to invest a little time and elbow grease, you can polish the pebbles off the cooking surface of a brand new cast iron skillet to leave a smooth surface (see How to Polish a New Cast Iron Skillet for two ways to do it).
Anticipate
Once hot, cast iron holds heat superbly, releasing it evenly, so you will soon learn to turn the heat down, or even off, a minute or so before you would a thinner pan.
How to Clean
Now that you know how to season cast iron and how to cook with it, you may also want to know how to clean it properly. There is a lot of hype, confusion, and conflicting advice out there about how to clean cast iron, but it is actually very easy to clean your cast iron skillet correctly and almost impossible to actually damage it.
- Most of the time all you need to do to clean cast iron is give it a quick wipe or rinse. As soon as you finish cooking, serve up the food, pour off any excess grease, and either wipe the inside with a dry cotton towel or rinse the still-hot skillet under running hot water, using a natural bristle brush to loosen any stray bits of food.
- There is no need to remove the last bit of oil or grease, in fact you don’t want to. That being said: if you just cooked something with a strong flavor, you may want to get rid of that. Add a few drops of natural dish soap to the hot water, give the pan a good swish with the brush, and rinse well. Brief exposure to soap won’t hurt the seasoned surface at all, and it sure beats having everything you cook taste vaguely fishy for weeks.
- If there are still stubborn bits of food crust stuck to the pan after rinsing, or you weren’t able to clean the pan immediately, fill the pan with warm water and put it on the stove on medium heat and let it simmer for a few minutes or until the food comes away easily, and then clean the pan under running water.
- When clean, dry the pan completely in a warm oven or on the stove top.
- Take a look at the inside surface of the dry pan: If it is smooth, dark, and glossy it is ready to put away. If it is grey and dull, coat it with a thin coat of oil or fat and warm it on a burner for a few minutes. Once it cools, it is ready to put away.
- Store your pan, uncovered, in a dry place to prevent rust. Upside down in an old-fashioned oven with a pilot light is good if you have humid summers — just remember to take it out before turning the oven on.
How NOT to Treat Your Cast Iron Pan
Now that you know how to season cast iron and you’ve learned about the proper way to clean it, here are a few tips on what not to do!
- Do not leave food, especially acidic foods such as spaghetti sauce, in your cast iron pan for more than a short time after cooking. The acid will react with the iron, making the food black and icky tasting, and start to eat away your carefully developed seasoning.
- Do NOT store your cast iron wet; it will rust.
- Do NOT run your cast iron through the dishwasher.
- Do NOT scrub with steel wool, steel coils, scouring powder, or cleansers.
- Do NOT plunge a hot pan into cold water, there is a remote chance of cracking it and a good chance of burning yourself with steam.
And … please do NOT flip out if you or anyone else abuses your cast iron cookware. Cast iron pans last forever and you can fix anything that happens to them (short of a crack). Relationships are more important and far harder to fix. Love your cast iron cookware, but love your family more.
Buying a Cast Iron Skillet
Do yourself a favor and get good quality cast iron. A good pan feels heavy for its size. Look for a handle that is comfortable in your hand. A second grab handle is nice for larger skillets, especially if you have any hand or wrist issues.
New or Vintage?
Most cooks agree that a vintage cast iron skillet is usually better quality than the new stuff sold today and has the potential to become more nonstick than a newer skillet does. If you can find a used cast iron skillet at a thrift or antique shop with a reasonable price tag (some brands have become collectibles and are priced accordingly), take a good look at it. As long as it isn’t cracked, badly pitted, or badly warped, any rust or caked-on gunk can easily be removed (see How to Prepare to Season Cast Iron) and the skillet rehabilitated into a prime cooking tool.
That being said, it is a lot easier to find and buy a new cast iron skillet, so most people end up buying new. There are many brands out there, some better than others: Lodge skillets are high quality cast iron, with a price tag to match. A number of reviewers give high marks to Simple Chef skillets, which come at a budget price, so that is another brand you may want to consider.
Size?
A 10-inch-diameter skillet is a good size for couples and small families and a good size to start with. An 8-inch skillet is good for smaller tasks and a 12-inch skillet is perfect for making a lot of food at one time. Some cooks like a 6-inch skillet for tiny jobs; others find one this size hard to maneuver in.
To Lid or Not to Lid?
Most cast iron skillets are sold without lids, but a matching lid can be useful. A tempered glass lid is nice, as you can see how things are going without lifting it. Cast iron lids are sometimes available, but they are heavy to use and store.
Do you Need a Handle Cover?
Most cast iron skillets have bare cast iron handles that get almost as hot as the cooking surface, offering the potential for nasty burns. If you are new to cooking with cast iron, you may want to get a silicone handle cover until you get used to the handle being hot and automatically reaching for a potholder before touching it.
How to Polish
Besides knowing how to season cast iron and how to clean it properly, you may also need to smooth out the surface. You can polish the pebbles off the cooking surface of a new cast iron skillet by hand with emery paper (sold in any hardware store or home improvement center) in a couple of hours (polishing is a good, mindless activity for when you are watching TV). Buy one sheet each of coarse, medium, and fine. Fold and tear the coarse emery paper into 4-inch-wide strips. Wrap a strip around a block of lumber or a stiff, dry kitchen sponge. Place a surface of the wrapped block flat on the cooking surface and rub with a firm, circular motion. You may want to wear a glove to protect your skin from the rough emery paper. Once the pebbles have been smoothed off and you can no longer feel them, repeat the polishing process with the medium paper, and then finally repeat the process with the fine paper to get rid of visible polishing marks. Polishing can also be done in considerably less time with an abrasive polishing head and an electric drill (check out this video to see how it’s done, and be sure to use all tools safely if you try it!).
Now that you know how to season cast iron you’re ready to enjoy cooking with your cast iron skillet!
How to Season Cast Iron (+ How to Clean Cast Iron)
Ingredients:
- cast iron skillet or other cast iron cookware
- flaxseed oil or coconut oil
Directions:
- Wash your new cast iron skillet in hot soapy water, rinse it well, and put it upside down in the oven, set to 200 degrees F or less, and allow it to dry completely.
- Once it is a dull gray color all over, move onto the actual seasoning process.
- Apply a very, very thin coating of oil to all surfaces of the item, including the underside, handle and sides of the skillet.
- Wipe off any excess, then bake it in a moderate (300 degrees F to 350 degrees F) oven for a few hours, and allow it to cool.
- Repeat a few times until the surface starts to turn an even or speckled brown.