This Dr. Axe content is medically reviewed or fact checked to ensure factually accurate information.
With strict editorial sourcing guidelines, we only link to academic research institutions, reputable media sites and, when research is available, medically peer-reviewed studies. Note that the numbers in parentheses (1, 2, etc.) are clickable links to these studies.
The information in our articles is NOT intended to replace a one-on-one relationship with a qualified health care professional and is not intended as medical advice.
This article is based on scientific evidence, written by experts and fact checked by our trained editorial staff. Note that the numbers in parentheses (1, 2, etc.) are clickable links to medically peer-reviewed studies.
Our team includes licensed nutritionists and dietitians, certified health education specialists, as well as certified strength and conditioning specialists, personal trainers and corrective exercise specialists. Our team aims to be not only thorough with its research, but also objective and unbiased.
The information in our articles is NOT intended to replace a one-on-one relationship with a qualified health care professional and is not intended as medical advice.
DIY Face Moisturizer with Shea Butter & Essential Oils
August 10, 2021

Moisturizing your face on a daily basis is crucial to having youthful skin. Your skin goes through a lot given its exposure to environmental toxins, as well as chemicals that may be in your food and skin care products. By moisturizing your face with a natural face moisturizer, you will help provide much needed nourishment, leaving your skin softer, more elastic and well-hydrated.
Additionally, using the right moisturizer as well as applying it at the right time can make a difference. You need a daily face moisturizer that includes key nutrients to enhance the skin. By applying it while the skin is damp, you can lock in a bit of moisture, helping keep the skin nice and supple — key characteristics of younger-looking skin!
Using a moisturizer that is compatible with your skin type is important, too. Here’s a recipe that works for all skin types.
How to Make Your Own DIY Face Moisturizer
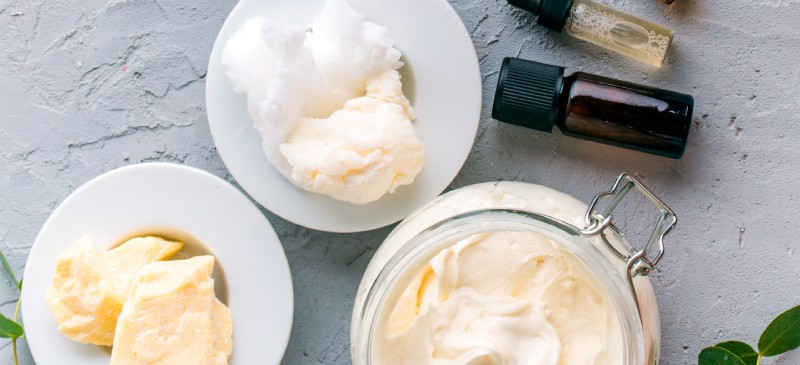
Let’s dive right in! Start by placing a small heat-safe bowl in a pan of hot water, or use a double-boiler. Pour the shea butter and argan oil into the bowl and blend until melted. Loaded with vitamin A, shea butter is very nourishing for the skin. It provides much-needed moisturizing while also reducing inflammation and boosting collagen production. Argan oil is another perfect ingredient since it also eases inflammation while offering the benefits of vitamin A, vitamin E and antioxidants.
Now that you have blended the shea butter and argan oil, carefully remove the bowl from the hot water. Add the carrot seed oil (unrefined and cold pressed — and NOT to be confused with carrot seed essential oil!) and blend using a fork or small spatula. (Substitute jojoba oil for carrot seed oil if you have trouble finding it.) Carrot seed oil does more than just help the eyes (in fact, pure carrot seed oil is edible), it is pretty amazing due to its super antioxidant qualities. These antioxidants — specifically carotenoids — give the skin amazing healing opportunities. (2)
OK, now it’s time to add the essential oils. I recommend lemongrass, lavender and chamomile oils for this recipe. Add the oils and make sure to blend well. Lemongrass oil is a fantastic brightening and toning agent that will help keep acne at bay. It has antiseptic and astringent properties, which can help you obtain glowing skin while sterilizing the pores and strengthening the facial skin.
It’s no surprise that lavender plays a role in this DIY face moisturizer. Lavender is very healing — not only for relaxing aromatherapy purposes, but also for skincare. It has the ability to restore the complexion and reduce acne, all while soothing you.
Chamomile oil is a little expensive, but well worth it. It promotes healthy skin with its anti-inflammatory and antibacterial properties and offers lots of healing as it soaks into your face.
Once you have made your DIY face moisturizer, you can transfer it to a small jar. Store it in a cool, dark place and it should last a few months; I sometimes keep my products in the fridge.
Apply each morning after you shower while your face is still moist and at night before bed after a gentle cleansing with my homemade face wash.
Daily moisturizing, with the right ingredients, is essential. In most cases, this DIY face moisturizer will not cause irritation. However, if you experience any discomfort or an allergic reaction, leave out the ingredient that causes the irritation. Or, try experimenting with leaving out certain oils to figure out which ingredient might be bothering you.
Print
DIY Face Moisturizer with Shea Butter
- Total Time: 5 minutes
- Yield: 30 applications 1x
Description
You need a daily face moisturizer that includes key nutrients to enhance the skin. These have some of the best ingredients, and it’s surprisingly easy to make!
Ingredients
- ½ cup shea butter
- 1 tablespoon argan oil
- 1 tablespoon carrot seed oil (NOT carrot seed essential oil; and can substitute jojoba oil)
- 5 drops lemongrass oil
- 10 drops lavender oil
- 6 drops chamomile oil
Instructions
- Pour argan oil and shea butter into a heat-safe bowl.
- Place the bowl in a pan of warm-to-hot water.
- Allow the shea butter to melt and blend the two ingredients.
- Carefully remove from heat and add the carrot seed oil. Blend well.
- Add the essential oils and blend again.
- Store in a glass container with a wide mouth.
- Apply to a clean face (wash it well with my homemade face wash) in the morning and at night.
Notes
Store it in a cool, dark place and it should last a few months; I sometimes keep my products in the fridge.
- Prep Time: 5 min
- Method: Blending
Comments
Please keep comments under 200 characters.


This is a balm not a cream. Although it is lovely and moisturising I couldn’t put make up on top as it’s too oily. I wanted a recipe for a cream.
Where is the best store in Adelaide South Australia to buy all the ingredients?
I find this recipe intriguing – thanks :)
Other than shea butter what else may i use?
Shea butter is a proven moisturizer for your skin. There are plenty of skincare products, at a variety of price points that contain shea butter as one of the main ingredients. you can check face serum
Easy to make . Thanks Dr Axe for sharing this recipe. What do you thiink of adding Bergamot oil to this mixture?
Can I use Carrot Tissue Oil
INCI: Helianthus annuus (and)
Beta Carotene. This is how the bottle reads it’s from a store called Voyageurs in Canada
Thank you
Hello Dr Axe! Is this recips good for all skin type. Do get back. Thanks!!!
Hi Star, this recipe is appropriate for most skin types, yes. If you are ever unsure, I recommend consulting with a dermatologist or esthetician for the recommended oils for your skin. I hope you enjoy!
Thank you Dr Axe, please can I use coconut oil in place of organic oil?
Has anyone with sensitive skin tried this? I used Neutrogena for years never made me breakout- would rather use all natural ingredients though.
An entire ounce of carrot seed oil? That makes this very expensive. Is that an error? Every other recipe I’ve ever seen using carrot seed oil uses only a few drops.
A few people have commented on the carrot seed oil. Maybe they are confusing it with carrot seed essential oil. Look for carrot seed oil, unrefined and cold pressed. I believe this is what’s used in this recipe.
I think you’re confusing carrot seed oil with carrot seed essential oil, which is much more expensive.
Hi, what can I substitute the carrot seed oil with? Live outside the US. Thanks!
Jojoba oil.
Love it! I added cocoa butter this time and love that I can play with the oils! I’m even going to whip it after it cools down and is creamy!!!
I’ve been using coconut oil and lavender on my face at night this winter because nothing else has helped my dry flaky skin especially on my forehead. It has helped tremendously like nothing else. I first tried fractionated coconut oil but it didn’t help so tried the organic oil. Do you see anything wrong with using it on my face? So far it works the best
You may have found this recipe already, Sharon. Coconut oil is fine to use on your face, or as a body oil. I find it beneficial. https://draxe.com/beauty/moisturizer-for-dry-skin/
Nothing. Use it on whatever you want! My mom likes it and I made it for friends too!
Where do you get all these ingredients from?
For those wondering about it staying in oil form, i put it in the freezer for about 30 minutes then whip it up with a mixer. it should whip up nicely. i do the same thing with my body butter recipe.
I’m trying to take care of my family. When I think I’m doing right, I later find out it’s all wrong! I’m so busy, I need a resource I can trust to turn to for healthy, nutritious recipes and food recommendations.
I just made this and it stayed in oil form. I was hoping for a cream, but I’ll test out the oil.
I have been diagnosed with Psoriatic Arthritis although I have never shown symptoms of Psoriasis, many in my family have. This being the case I am trying to jettison all toxins and was thrilled to find your site with all these wonderful recipes. I made this moisturizer and used it on my face regularly then I actually started to get a psoriasis patch on either side of my mouth. Why?! Which ingredient is most likely to have caused this reaction and I will try again without it. Is there another recipe you would recommend?
get the book by John A. Pagano, a holistic chiropractor. He outlines a program with no medication. You can order it online. it works.
I love the way this smells. I am curious if it is supposed to stay in oil form as the picture looks more like a cream? Worried I might have gotten something wrong (even though I followed the directions perfectly). Thanks!
Whip it
I love the way it smells too, mine stayed in oil form as well I put it in the refrigerator- I like the texture better. Overall… amazing- thanks, Dr. Axe!
I was looking at some of your recipes and just wanted to know do you use organic Shea butter?