This Dr. Axe content is medically reviewed or fact checked to ensure factually accurate information.
With strict editorial sourcing guidelines, we only link to academic research institutions, reputable media sites and, when research is available, medically peer-reviewed studies. Note that the numbers in parentheses (1, 2, etc.) are clickable links to these studies.
The information in our articles is NOT intended to replace a one-on-one relationship with a qualified health care professional and is not intended as medical advice.
This article is based on scientific evidence, written by experts and fact checked by our trained editorial staff. Note that the numbers in parentheses (1, 2, etc.) are clickable links to medically peer-reviewed studies.
Our team includes licensed nutritionists and dietitians, certified health education specialists, as well as certified strength and conditioning specialists, personal trainers and corrective exercise specialists. Our team aims to be not only thorough with its research, but also objective and unbiased.
The information in our articles is NOT intended to replace a one-on-one relationship with a qualified health care professional and is not intended as medical advice.
How to Carve a Pumpkin Step by Step
October 19, 2022
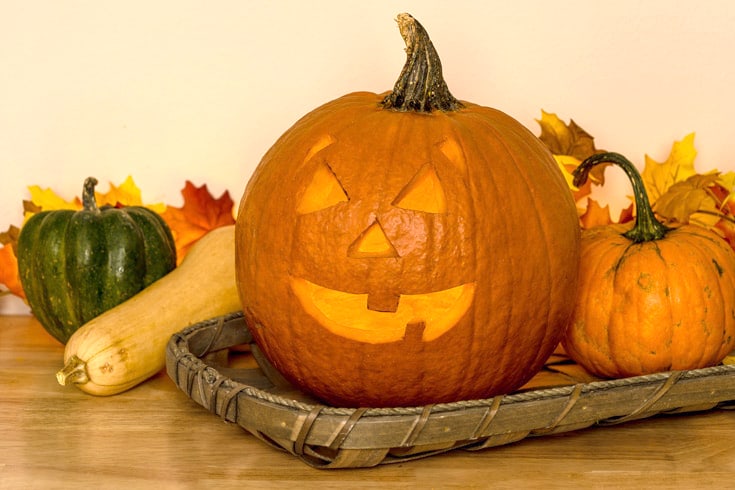
Before the pumpkin spice latte (and pumpkin spice everything else) craze swept the nation, fall was plain ol’ pumpkin season: pumpkin pie, pumpkin soup and, of course, pumpkins carved into jack-o’-lanterns. As a Halloween tradition, it can be fun to learn how to carve a pumpkin and make your own jack-o’-lantern.
“Pumpkin” is a term used for certain winter squashes, typically orange ones with ribs, but in recent years, many other colors (including white, tan, red and dark green) and shapes of pumpkins have become more common. All pumpkins are winter squashes, but only some winter squashes are pumpkins.
Winter squashes all have a thick layer of edible flesh inside a tough skin and a central cavity loosely filled with stringy flesh and edible seeds. All pumpkins, even the tiny, ornamental ones, are edible, b choose organic pumpkins if you plan to eat them, as conventional growers tend to spray the crop quite frequently.
Pumpkins are not gourds, even though pumpkins and gourds are both used for fall decorating. They are occasionally (and incorrectly) labeled as gourds and vice versa.
How can you tell a gourd from a pumpkin? Cut it open: Pumpkins have firm, but moist, flesh inside their hard skin.

Ripe gourds usually have a thick, woody shell, and any flesh that remains is dry and fibrous (loofah sponges are an example of gourd fibers).
Read on to learn more about how to carve a pumpkin and why we carve them in the first place.
Why Are Pumpkins Carved at Halloween?
Before you learn how to carve a pumpkin, you may well be wondering why we do it in the first place. The tradition of carving pumpkins into scary faces has its roots in Ireland.
Turnips, beets and even potatoes were hollowed out, carved and illuminated to scare evil spirits away on All Hallows’ Eve, the night before All Hallows’ Day (All-Saints’ Day). It is quite probable that carved and illuminated veggies were a part of Celtic fall festivals long before St. Patrick stepped onto the Emerald Isle.
The term “jack-o’-lantern” refers to the spooky flickering of the candle flame inside. The candlelight reminded people of the flickering lights that appear and disappear over swamps and bogs, referred to as “will-o’-the-wisps” or “jack-o’-lanterns.”
When Irish immigrants came to the U.S. they brought their traditions with them. They rapidly adopted the pumpkin as the vegetable of choice.
It made sense for them to figure out how to carve a pumpkin as it was larger and already hollow. This made it much easier to carve than to hollow out and carve even a very large root vegetable.
Today’s jack-o’-lanterns may still sport scary faces, but they are more likely to be put out for fun or to welcome costumed trick-or-treaters than as an effort to scare evil spirits away.
Related: Canned Pumpkin: Is It Really Pumpkin & Is It Good for You?
Pick a Perfect Pumpkin to Carve
Before we talk about how to carve a pumpkin, let’s talk about how to select one.
- Look for a firm, solid pumpkin with no soft spots, cuts or other damaged areas (dry callused areas are OK).
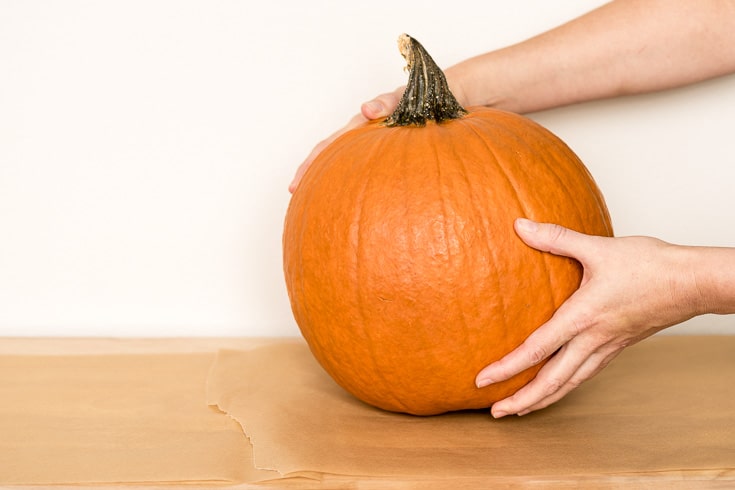
- Check all surfaces and especially around the base of the stem and on the bottom. Oh, and while the stem may look like a carrying handle, avoid toting the pumpkin around by it as it may break off, leaving a nasty, rot-prone gash. Instead, pick your pumpkin up from the sides or bottom with both hands.
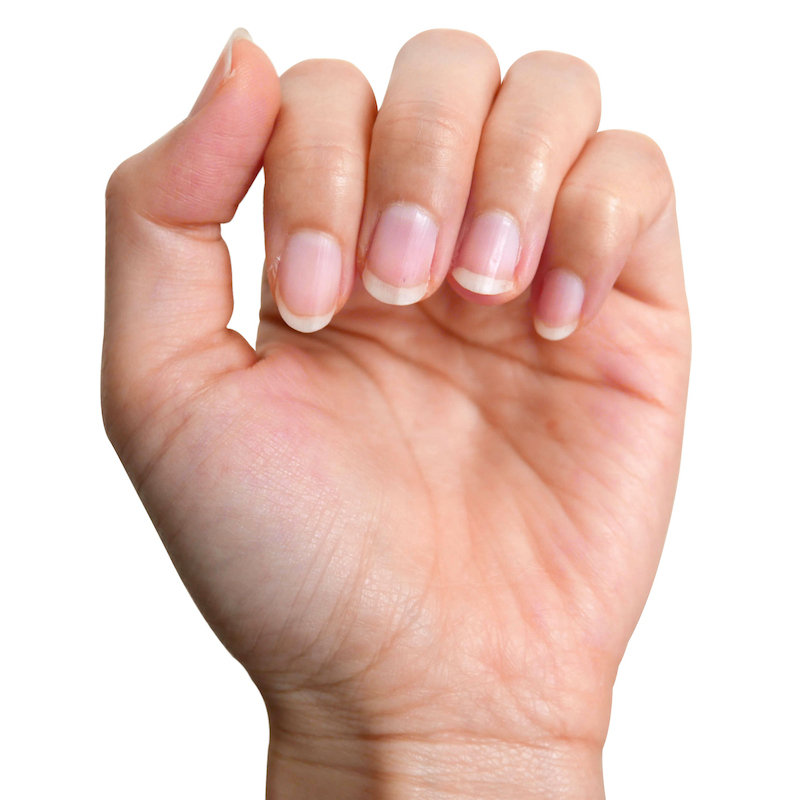
- Select a mature pumpkin. You can tell a mature pumpkin by its thick, puncture-resistant skin. (If you can cut the skin with your fingernail it isn’t ripe, and it won’t last long, so look for another pumpkin.)
- Shop at a local farm, as pumpkins shipped across the country may pick up bruises along the way, and bruises can lead to premature spoilage.
- Be sure to consider the ugly, asymmetrical pumpkins, as you can often use their shape as part of your design.
- When you get it home, give the outside of your pumpkin a good scrub with natural dish soap or castile soap to help reduce the number of microorganisms hanging out on the skin, just waiting for you to cut into it so they can feast.
- Plan on displaying your pumpkin uncarved until a day or two before the big day. (If you just can’t wait, buy one to carve right away and another to carve right before Halloween.)
How to Carve a Pumpkin Step by Step
If you are wondering how to carve a pumpkin into a jack-o’-lantern, here’s what you need to know: Obviously, you need a pumpkin (see above) — plus you’ll need a couple of tools for cutting, scraping and carving. (You probably have some in your kitchen drawers that will work.)
Cutting/carving tools:
A sharp, sturdy, long-bladed knife and a sharp paring knife are serviceable carving tools for making a simple jack-o’-lantern. For fancier designs and easy pumpkin carving, you may want to invest in a few safer and more exact implements, such as tiny saws and an awl (for making holes to start sawing from).
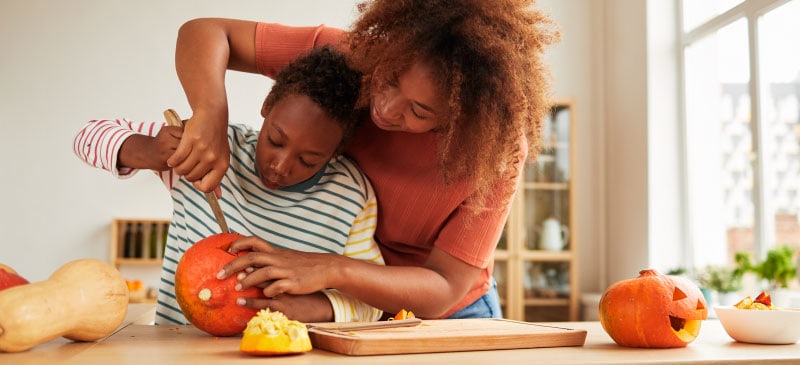
A saw and awl combo also makes for safer fingers and is highly recommended for safe pumpkin carving with small children (saving both fingers and your nerves).
If you have an apple-corer, that works well for making round holes or rounding corners. Any chisels or carving tools you have for working with other materials can also be used (although they are not safe options for children) — just be sure to clean and dry the tools well after use to avoid rusting.
Once you learn the basics of how to carve a pumpkin, you may want to experiment with different tools. Pros even use an electric carving tool, such as a Dremel.
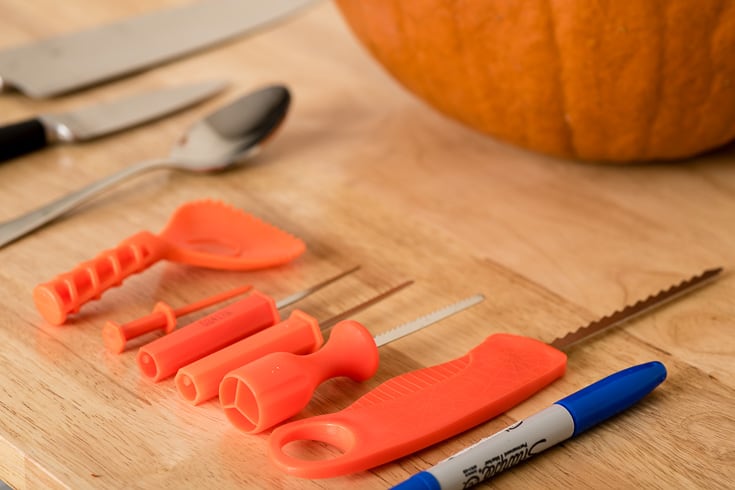
Scooping and scraping tools:
Your hand makes a good scoop for extracting the bulk of the seeds and the stringy fibrous goo, but to get out all the guts, you’ll probably want a scraper other than your fingernails. A tablespoon, soup spoon (the thinner the bowl the better, as the edge will be sharper) or a melon-baller make serviceable scrapers for getting the last of the stringy guts out of a pumpkin.
You can also buy specialized scrapers/scoops that have wide blades and short handles, which are easier to manipulate inside a pumpkin.
Now that you have your tools, here is, step by step, how to carve a pumpkin into a jack-o’-lantern:
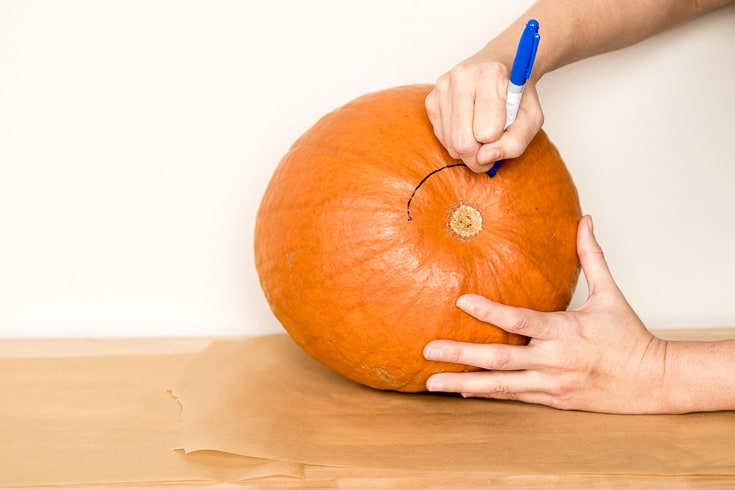
Step 1. Cut into the pumpkin.
Place your pumpkin on a solid surface you can wash (or spread newspaper to catch any drips). Draw the proposed cut on the skin with a felt tip marker: You want the hole large enough to get your fist through but no larger, as you want to keep as much of the pumpkin intact as possible so it will keep its shape for as long as possible.
Most pictures you see show a lid cut out from the top and centered around the stem, and that’s fine. When you make the cut for a top opening and stemmed lid, angle the knife in toward the center of the opposite side of the pumpkin, rather than straight down, to create a rim for the lid to sit on. (If you cut straight down your lid will fall into the cavity when you put it back on.)
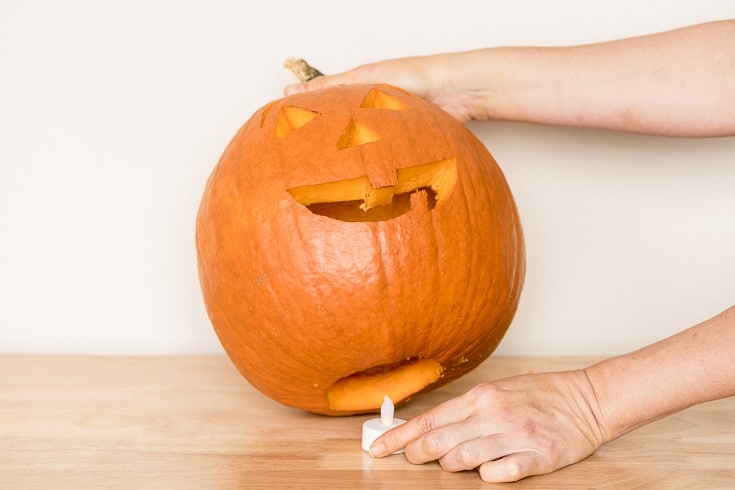
Let me tell you how to carve a pumpkin a better way: Make a straight-sided opening into the center of the bottom of the pumpkin. This has three advantages:
- You won’t have a lid to fall in as the pumpkin softens.
- Weeping liquids won’t build up in the carved pumpkin to attract insects and encourage spoilage.
- It will be much easier to light the jack-o’-lantern with a candle. (You just light the candle and then set the jack-o’-lantern down over the lighted candle, rather than fussing around inside your carved pumpkin with a match or lighter and ending up with singed fingers.)
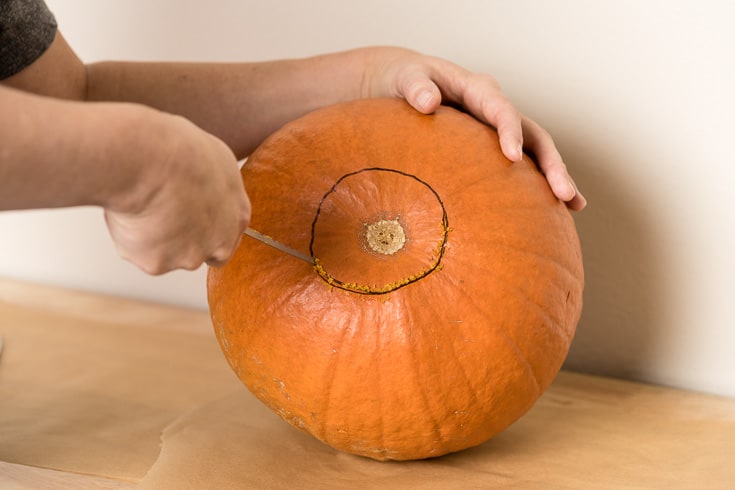
Use a heavy knife with a sharp point or an awl and pumpkin saw to cut through the skin and flesh and into the seed cavity in the center of the pumpkin. Caution: Pumpkin skin is tough, and raw pumpkin flesh is hard!
Be very careful when working with a knife, as you will have to push hard, and it is easy to slip and cut too far (or yourself). Once you finish the cut, lift/pull the cut part out.
You may need to gently pry it out by inserting your sturdy knife (or a sturdy butter knife, if you’ve been cutting with a small saw) under one edge. Cut/scrape the stringy guts off the inside of your lid (no need to do this if you cut a hole in the bottom), and set it aside.
Step 2. Pull out the guts and seeds.
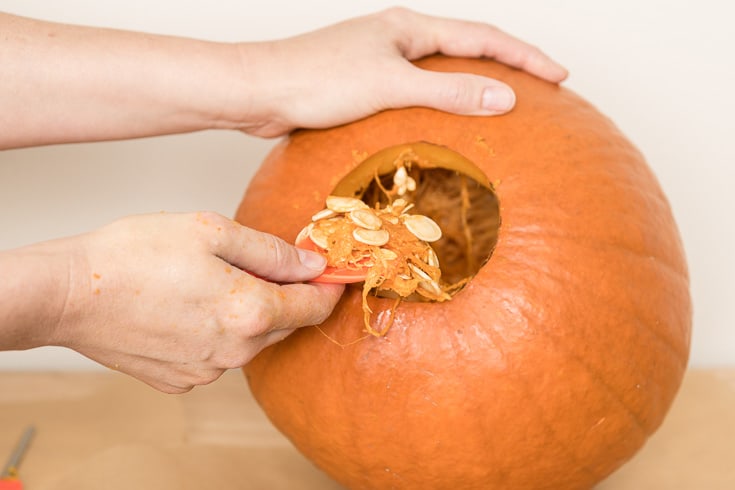
Scoop out the stringy pulp and seeds with your hands or a long-handled spoon, placing the seeds in one bowl (for roasting later; see below) and the pulp in another one for the chickens or the compost pile. Scrape the inside of the pumpkin to get out every scrap of the stringy, soft pulp (any remaining pulp will speed the spoiling process), leaving only firm, hard flesh. Wipe the inside dry.
Step 3. Draw your design.
Once you’ve made a cut you can’t erase it, so it’s a good idea to sketch your design onto the surface of the pumpkin before picking up a cutting tool. A felt tip marker works well for sketching and drawing.
Once you have the general sketching done, you can use an awl and poke small holes where you plan to cut (but you can’t erase these either, so you want to be sure before you do this).
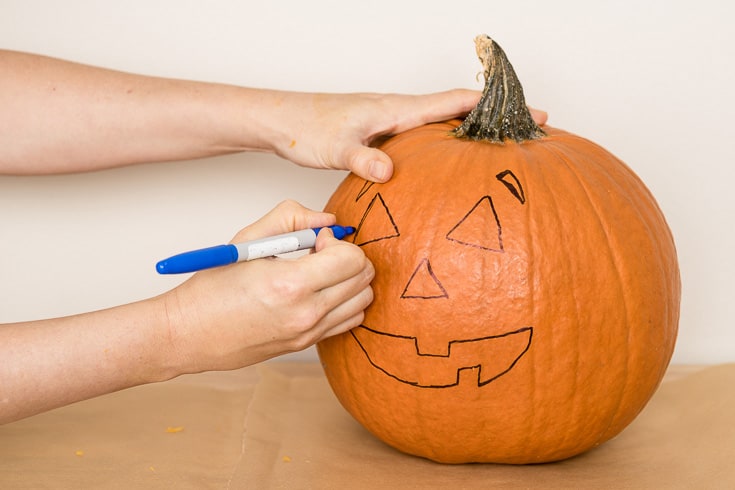
As you’re learning how to carve a pumpkin, it may be easier to draw simple shapes with straight sides, such as triangles, especially if you will be cutting them out with a knife. You may want to use a pre-made pattern.
You can be more creative if you will be cutting with a saw, but remember to leave enough undisturbed flesh between the individual shapes to support the pumpkin after it’s cut and starts to soften or dry out.
Step 4. Cut out your design.
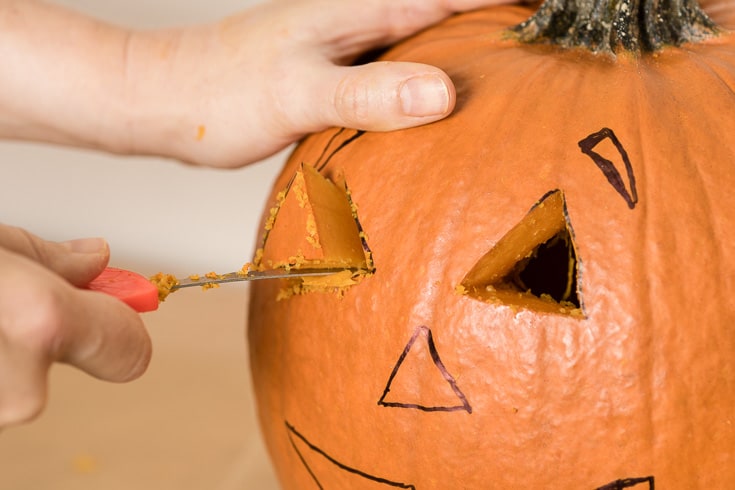
Use a small, sharp knife or an awl and saw (this second option is much safer and easier) to cut along the edges of your marked design. Then gently press the loose bits into or out of the pumpkin with your finger.
For large or complicated openings, such as toothy grins, it works best to cut out small sections of the shape at a time. These bits of flesh can be cooked and eaten or tossed to the chickens or into the compost.
Step 5: Condition your jack-o’-lantern.
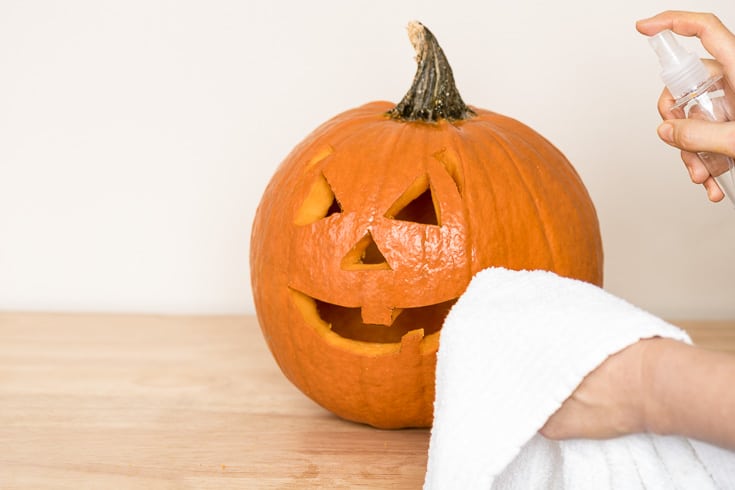
Once you have finished carving your pumpkin, spray or wipe the inside of the cavity and all the cut surfaces with an essential oil-based cleaning spray, such as our melaleuca oil household cleaner or with a solution of 1 teaspoon borax dissolved in a quart of warm water. Even better: Soak the carved pumpkin overnight in a tub of borax water (1 tablespoon per gallon).
Step 6: Illuminate your jack-o’-lantern.
Once you’ve carved a pumpkin into a jack-o’-lantern, you’ll want to show it off by putting a light inside to shine through the design. Tea light candles are a good size and easy to keep upright.
If you keep them inside a glass holder, they are less likely to blow out on a windy evening.
Use long fireplace matches or a lighter with a long neck to help protect your fingers and hands while lighting a candle inside a jack-o’-lantern. If you cut your initial opening in the bottom, this isn’t an issue as you just light the candle out in the open and then lower the jack-o’-lantern over it.
Be sure to treat all lighted candles with respect, keeping them away from anything that could catch fire, and extinguish them when you can’t keep an eye on them.
You can also use a battery-operated tea light or wrap a short string of outdoor-rated Christmas lights around a glass jar and put that inside instead of a candle. (Blinking ones make for an extra-spooky effect.)
Make Your Jack-o’-lantern Last Longer
A pumpkin with an intact skin will stay fresh and good for many months. As soon as you pierce the skin, microorganisms, such as fungi, bacteria and molds, and insects can dig in and start breaking it down (a process we refer to as spoiling, rotting or composting).
Exposure to oxygen and loss of moisture into dry air also contribute to the breakdown. There are a few things you can do so your carved pumpkin stays reasonably firm and attractive for as long as possible.
In hot weather, storing your jack-o’-lantern in the refrigerator when not displaying it is a great way to extend its life, if you have room.
Soak your carved pumpkin in a tub of borax water (1 tablespoon per gallon) for at least a few hours every day. This will help slow down the rot and mold, and it will help keep your carved pumpkin plump and perky in dry climates where dehydration is an issue.
If fruit flies become a problem, place a trap nearby to thin down the population before they lay a gazillion eggs. Make your own trap by putting an inch of leftover juice, beer or wine in a tall glass.
Then set a small funnel in it (the tip needs to be above the level of the liquid): Flies fly in but have a hard time finding their way out and eventually drown.
If your local squirrels decide you’ve put out a tasty snack for their benefit, sprinkle all the cut surfaces with cayenne pepper powder, or wipe with a paste of cayenne powder, a little water and a drop or two of liquid soap. (Take care not to get cayenne in your eyes.)
Related: 40 Pumpkin Recipes (Not Your Traditional Pumpkin Pie)
How to Roast Pumpkin Seeds
Now that you’ve learned how to carve a pumpkin and you have your jack-o’-lantern, you may be wondering what to do with the seeds. Pumpkin seeds are loaded with protein, minerals and good taste, so make eating them part of your pumpkin-carving tradition.
First clean the seeds you collected by removing all the large bits of pulp with your fingers. Then fill the bowl with water.
Pinch off and remove any fibers that remain to leave just seeds. Swirl the seeds around, and pour off the cloudy water.
Refill and repeat until the water remains clear. Drain in a colander.
Saute the seeds in coconut oil with the seasonings of your choice, or spread the dry seeds in a single layer and bake them at 300 degrees Fahrenheit in the oven for 15–20 minutes, checking frequently toward the end. You want them to be dry and crunchy but not so brown they taste burnt.
You can eat them plain or toss them with coconut oil and sweet or savory seasonings. Then return them to the oven for a few more minutes.
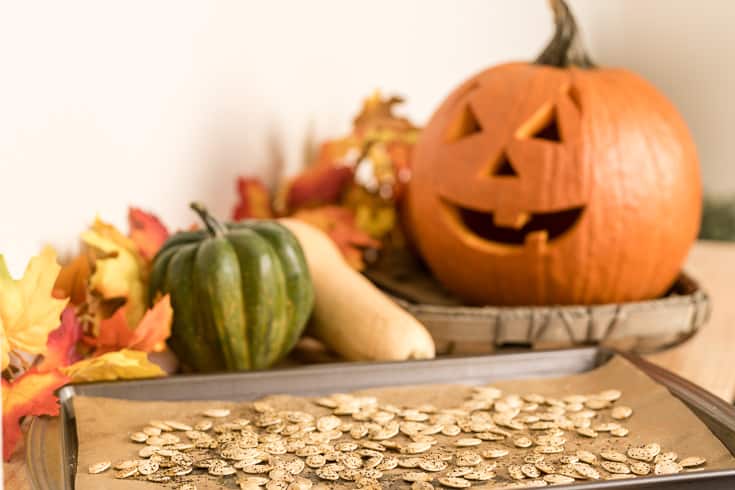
NOTE: Unlike the pepitas you buy at the store (which come from special “naked seeded” pumpkin cultivars, such as “Kakai” or “Lady Godiva”), most pumpkin seeds have a thin, papery shell around the green, meaty seed inside. It’s fine to eat the shells, or you can spit out the tough bits as you might sunflower seed shells.
Print
Pumpkin Carving Instructions
- Total Time: 1 hr
Description
As a Halloween tradition, it can be fun to learn how to carve a pumpkin the best way possible and make your own jack-o’-lantern.
Ingredients
- pumpkin
- carving tools: knives, small saws and awls
- felt tip marker
- tea light candles (regular or battery-operated)
Instructions
- Place your pumpkin on a solid surface you can wash (or spread newspaper to catch any drips).
- Draw the proposed cut on the skin with a felt tip marker. I recommend drawing the opening on the bottom of the pumpkin.
- Make a straight-sided opening into the center of the bottom of the pumpkin.
- Scoop out the stringy pulp and seeds with your hands or a long-handled spoon, placing the seeds in one bowl (for roasting later) and the pulp in another one for the chickens or the compost pile.
- Draw your design. Simple shapes such as triangles may be easier to work with if you are new to carving a pumpkin.
- Cut out your design.
- Once you have finished carving, spray or wipe the inside of the cavity, and all the cut surfaces, with an essential-oil-based cleaning spray. Or soak the finished pumpkin overnight in a tub of borax water.
- Now it’s time to illuminate your jack-o’-lantern. Tea light candles are a good size and easy to keep upright.
Notes
If your local squirrels decide you’ve put out a tasty snack for their benefit, sprinkle all the cut surfaces with cayenne pepper powder, or wipe with a paste of cayenne powder, a little water and a drop or two of liquid soap.
Popular Beauty Posts