
This Dr. Axe content is medically reviewed or fact checked to ensure factually accurate information.
With strict editorial sourcing guidelines, we only link to academic research institutions, reputable media sites and, when research is available, medically peer-reviewed studies. Note that the numbers in parentheses (1, 2, etc.) are clickable links to these studies.
The information in our articles is NOT intended to replace a one-on-one relationship with a qualified health care professional and is not intended as medical advice.
This article is based on scientific evidence, written by experts and fact checked by our trained editorial staff. Note that the numbers in parentheses (1, 2, etc.) are clickable links to medically peer-reviewed studies.
Our team includes licensed nutritionists and dietitians, certified health education specialists, as well as certified strength and conditioning specialists, personal trainers and corrective exercise specialists. Our team aims to be not only thorough with its research, but also objective and unbiased.
The information in our articles is NOT intended to replace a one-on-one relationship with a qualified health care professional and is not intended as medical advice.
Homemade Honey Herbal Cough Drops
December 7, 2021
If you’ve ever perused the astonishingly large (and depressingly unnatural) selection of cough drops and throat lozenges at your local drug store, you may have found yourself wishing for simple and wholesome cough drops, made without all the refined sugar (or artificial sweeteners) and the long list of odd, unpronounceable and possibly problematic additives.
Maybe, like me, you just aren’t fond of the overpowering flavor of menthol (I can’t suck on one for more than a minute or two without taking a break), which seems to be in almost every flavor. Or maybe you really want to use organic ingredients, specific herbs and be totally sure the cough drops are safe for everyone in your family.
Good News: If you have a little time and patience, making your own herbal honey cough drops or honey candy drops is reasonably easy.
Key Ingredients
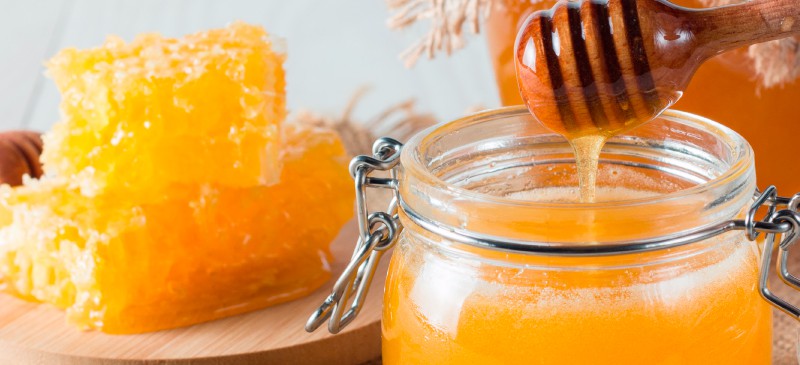
Unlike the “honey” cough drops at the store, these drops are made from real, raw honey with no other sweeteners. Plus, they’re flavored with real herbs. You can also use Manuka honey to make Manuka honey cough drops.
Herbs for Coughs
- Basil
- Cypress (helps calm coughs, clear congestion, and loosen phlegm)
- Echinacea
- Elderberry juice
- Eucalyptus (helps open nasal congestion)
- Frankincense (especially good for phlegmy cough)
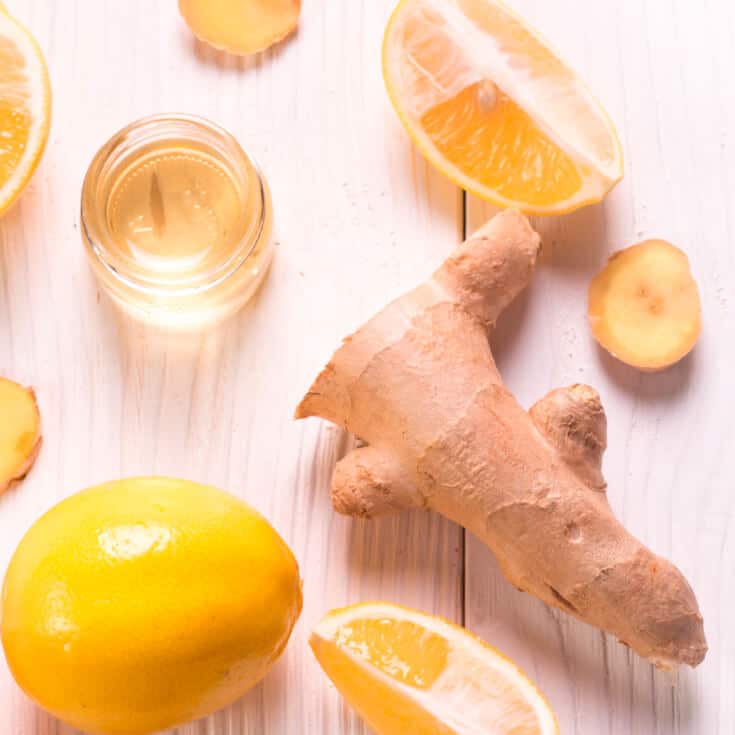
- Ginger
- Lavender
- Lemon peel
- Oregano (shown to help fight upper respiratory infections)
- Peppermint (shown to help calm coughs)
- Rosemary
- Thyme
Herbs for Sore Throats
If your sore throat is part of an upper respiratory infection you may want to include some of those herbs listed above for coughs, as well as one or more of the following.
The herbs in this list are also useful for sore throats due to talking or singing too much.
- Cayenne powder
- Fenugreek
- Juniper berry
- Licorice root
- Marshmallow root
- Slippery elm bark (especially good for dry, irritated throats)
How to Make Homemade Honey Cough Drops
Honey Herbal Cough Drops
Pour 1 ½ cups of boiling water over the herbs of your choice. (I use six tea bags of a commercial throat-soothing herbal tea blend. You can use six tablespoons of the dried herbs of your choice or up to a cup of dried herbs if you want really strong cough drops.)
Allow the herbs to steep for at least 20 minutes or until the water is cool. Squeeze the liquid out of the herbs and discard them. Strain the resulting tea.
Combine your herbal tea with the honey in a small, deep saucepan with a heavy bottom. (Tall sides help prevent boil-over. A heavy bottom helps prevent scorching.)
Clip a candy thermometer to the side, with the tip in the liquid but not touching the bottom. Bring to a boil, and simmer, stirring frequently, until the temperature reaches 300 degrees Fahrenheit.
As the mixture thickens and condenses, you may need to tip the pan sideways to take an accurate reading. This will take somewhere in the neighborhood of 30 minutes — to help you plan — but you need to go by the thermometer, not the clock, to get good results.
Be careful! Boiling sugar syrup is hot, and it will stick to your skin and cause a nasty burn if it spatters or spills on you.
If you don’t have a candy thermometer, set a glass of ice water next to the stove, and periodically drop a single drop of your boiling mixture into the water. At first, the drop will just disburse into the water. As cooking proceeds, the drop will first hold together in a soft ball you can flatten, then dent, with your fingers when you fish it out.
Finally, a drop of boiling syrup will get so hard you can’t even dent it between your fingers the instant it hits the water. This is the “hard drop stage,” which is your goal.
While the syrup is cooking down, prepare your pan. It’s also a good time to cut pieces of waxed paper or cellophane to package your drops. I use wax paper, cut into 3-inch-by-4-inch rectangles.
When your syrup reaches 300 F, or the “hard drop stage,” immediately pour it into your prepared pan to cool, using a silicone scraper to get it all out of the saucepan.
Immediately fill the saucepan with hot water. Don’t use cold water because it will instantly turn the remainders rock hard, causing tedious cleanup.
Allow the mixture to cool until you can just handle it without burning your hands. This will take 15 to 30 minutes, depending on the temperature of your room.
Lay out a clean silicone sheet or length of wax paper to work on, and dust it with the anti-stick powder of your choice. I usually use tapioca flour, but I’ve also used a Mexican hot cocoa blend of cocoa powder, a little sugar, hot pepper powder and ground cinnamon, which was dynamite!
When you can handle the mixture use a knife or scissors (dip into cold water between cuts to minimize sticking) to cut the hardening mixture into long strips and then drop-sized bits, and place them on your powdered work surface.
You can shape them a little to round the corners as you go, but don’t dawdle, as the workable stage is fleeting. Once they are all shaped, toss them, a few at a time, into a jar with ¼ cup of your anti-stick powder, and give it a shake to cover all sides.
Tap off the excess, and wrap each one securely. Then place the wrapped drops in a jar with a tight-fitting lid.
Honey drops are water magnets, and if there is any humidity in the air the outsides of the drops will start to get tacky quite rapidly. (A few hours at high humidity will create little puddles.)
You can still rescue them by shaking them in a jar with your anti-stick powder, but they will soak up more of it. You may be tempted to skip the wrapping step, but don’t: There is a reason commercial cough drops are wrapped.
If honey-based drops, even those well-dusted with anti-stick powder, aren’t wrapped individually, they will stick to each other and eventually become one large drop. (In hot, humid weather this can happen in just a few hours.)
Store your jar in a cool location, and use your drops as needed to soothe your throat and calm coughs.
Other Homemade Cough Drop Recipes
Here are a few variations you may also want to try:
Pure Honey Cough Drops
Sometime you just want plain honey drops. These are also an excellent choice if you are worried about using herbal cough drops while pregnant.
Prepare as for the honey herbal cough drops, but don’t add anything to the honey. Since you are not adding water, the cooking process will take much less time.
Just be sure to heat the honey and slowly at first, as it can scorch more easily than diluted honey.
Honey Cough Drops with Essential Oils
Prepare for honey cough drops, but add a few drops of a pure essential oil, such as ginger, peppermint (especially good for coughs), lemon, lavender, oregano, juniper berry, eucalyptus and/or frankincense, just before pouring the hot mixture onto the pan to cool.
Honey Cough Drops with Natural Fruit Flavor
Prepare for herbal cough drops, but replace the herbal tea with unsweetened fruit juice. Elderberry juice is an especially good choice as elderberry has been shown to reduce the duration and severity of the flu and colds.
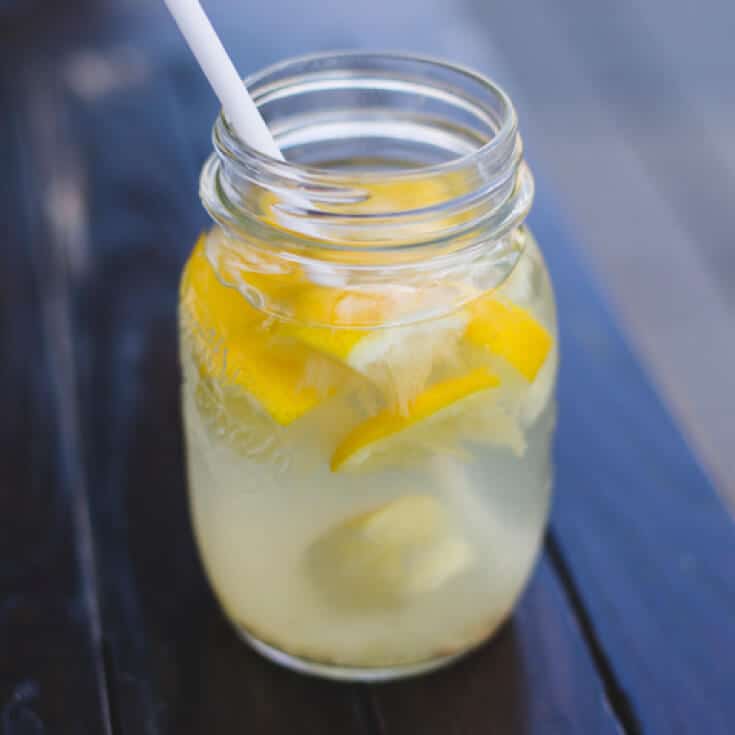
A friend of mine uses fresh-squeezed organic lemon juice for honey-lemon drops.
Cough Syrup
Sometimes a drop isn’t a good option (such as when you are falling asleep). If you need a soothing liquid cough syrup, try a spoonful of plain honey before bed, a remedy that has been shown to be more effective at reducing nighttime cough frequency than the over-the-counter drugs dextromethorphan and diphenhydramine.
You also could whip up a batch of our essential oil-enriched homemade cough syrup, which will give you relief without resorting to a syrup with potentially problematic ingredients.
As an aside, be sure to give prescription syrups containing the narcotic codeine a pass. They just aren’t worth the risks.
Print
Homemade Honey Herbal Cough Drops
- Total Time: 2 hrs
- Yield: 48 drops 1x
Description
If you have a little time and patience, making your own herbal honey cough drops or honey candy drops is reasonably easy. Read more here.
Ingredients
- 1 cup pure honey
- 1 cup strong herbal tea
- 1/3 cup tapioca flour, arrowroot flour, powdered slippery elm bark, vitamin C powder, or even unsweetened cocoa powder spiked with ground hot pepper and cinnamon
- candy thermometer
- heavy-bottomed saucepan
- silicone cake pan, silicone cookie sheet or cookie sheet greased with coconut oil (or candy molds, which will save time later but are completely optional)
- wax paper or cellophane (for wrapping drops)
Instructions
- Pour 1 ½ cups of boiling water over the herbs of your choice.
- Allow the herbs to steep for at least 20 minutes or until the water is cool. Squeeze the liquid out of the herbs and discard them. Strain the resulting tea.
- Combine your herbal tea with the honey in a small, deep saucepan with a heavy bottom.
- Clip a candy thermometer to the side, with the tip in the liquid but not touching the bottom. Bring to a boil and simmer, stirring frequently, until the temperature reaches 300°F.
- As the mixture thickens and condenses, you may need to tip the pan sideways to take an accurate reading.
- While the syrup is cooking down, prepare your pan. It’s also a good time to cut pieces of waxed paper or cellophane to package your drops. I use wax paper, cut into 3-inch-by-4-inch rectangles.
- When your syrup reaches 300°F, or the “hard drop stage,” immediately pour it into your prepared pan to cool, using a silicone scraper to get it all out of the saucepan.
- Immediately fill the saucepan with hot water.
- Allow the mixture to cool until you can just handle it without burning your hands. This will take 15 to 30 minutes.
- Lay out a clean silicone sheet or length of wax paper to work on and dust it with the anti-stick powder of your choice.
- When you can handle the mixture use a knife or scissors (dip into cold water between cuts to minimize sticking) to cut the hardening mixture into long strips and then drop-sized bits and place them on your powdered work surface.
- You can shape them a little to round the corners as you go, but don’t dawdle, as the workable stage is fleeting.
- Once they are all shaped, toss them, a few at a time, into a jar with ¼ cup of your anti-stick powder, and give it a shake to cover all sides.
- Tap off the excess and wrap each one securely. Then place the wrapped drops in a jar with a tight-fitting lid.
- Store your jar in a cool location and use your drops as needed to soothe your throat and calm coughs.
Notes
- Experiment with the ingredients for different flavor profiles and nutrients.
- Heating honey does negate some of its benefits, but it’s necessary to make homemade cough drops. The additional herbs and oils used help make up for any honey benefits lost in the heating process.
Comments
Please keep comments under 200 characters.
Leave a Reply
28 Comments
Popular Beauty Posts


Thank you 😊
Question- how to safely dilute, apply (when do i put the oil in) & use -frankincense oil – when making cough drops/syrup?
Marguerite
What is the shelf-life for these?
I like the idea of using honey instead of sugar, but all beneficial enzymes will be destroyed if the honey gets boiled. Can the cough drops be prepared at a lower temperature?
Thanks for making these recipes available
If you heat the honey to 300 degrees you are defeating the purpose of the honey. It destroys all of its antibacterial, etc. properties????
Sharon V.
Great ideas thank you! Two things… won’t cooking the (Manuka) honey just ruin the benefits? Also, I thought about making suckers on a stick for little ones to prevent choking or swallowing drops whole. What do you think?
herbal Honey Candy is very useful Cough Medicine .Thanks Valuable information
Perfect 99 – Herbal Cough Syrup, Perfect 99 Herbal Candy, Herbal Secret Capsule and Perfumes. Please Visit
https://www.perfect99.in/
Thank you for ur useful information
I have learned from other sources that it is harmful to boil your honey
I would like to see your sources, please.
I couldn’t find in recipe of herbal honey cough drops what the amount of honey you added! How much honey do you need? Can’t wait to try’s! Dr Axe,you are awesome! Thanks for sharing some much of your healthy recipes and tips! I’m a new person because of you!
The recipe calls for 1cup of pure honey. There is a list of ingredients near the top. Hope this helps. I honestly didn’t see it at first either.
The recipe sounds good, but I’m not cooking with honey; it’s toxic cooking with honey!!!
i have cooked with honey all my adult life and i am still living. and i am 58
Tell that to the Greeks, they been using it as medicine for 7000 years
Can I use natural parchment paper instead of wax paper? Wax paper is full of parrafin and petrochemicals.
Yes you can, it just needs something basically non stick so you can unwrap them=3
How long will these last stored in the cabinet?
This was not as easy as the recipe made it seem. I cooked the mixture for a couple hours and it never reached the hard crack stage on the thermometer; it got to about 275 when i gave up and decided to just move to the next step. I kept tasting it along the way and it just tastes like burnt honey. I don’t know how it could take “around 30 minutes” for one person, but several hours for me. Unless it has something to do with the cold rainy weather here in Seattle.
I couldn’t get over 200°
I just poured it in my mold and let it sit. It got thick but didn’t harden. So I just put it in the freezer. If it doesn’t get hard, I’m gonna put it in the oven…this wasn’t as easy as it reads
It does take a while. It seemed like forever to me as the temperature seemed to peak at around 250, but it takes patience. Honestly, I was about to give up the first time. But after it gets past that 250 “hump” (for me) it gets to 300 pretty quickly. The drops have turned out perfectly the several times I’ve made them and my kids love them. It’s basically impossible to keep them from eating them like candy, so they never last long in our home!
Is the homemade cough syrup safe for kids? Ages 5,7 and 9?
I don’t know? Is it?
but honey become toxic if heated!?
Honey has been used safely in baking for centuries; the heat is 300 degrees;
Hello, what brand of essential oils do you use?
I only use pure essential oils. The ones sold on Dr Axe’s site are likely very good and safe for ingestion. I use Young Living oils.
Can you use a silicon candy mold?