This Dr. Axe content is medically reviewed or fact checked to ensure factually accurate information.
With strict editorial sourcing guidelines, we only link to academic research institutions, reputable media sites and, when research is available, medically peer-reviewed studies. Note that the numbers in parentheses (1, 2, etc.) are clickable links to these studies.
The information in our articles is NOT intended to replace a one-on-one relationship with a qualified health care professional and is not intended as medical advice.
This article is based on scientific evidence, written by experts and fact checked by our trained editorial staff. Note that the numbers in parentheses (1, 2, etc.) are clickable links to medically peer-reviewed studies.
Our team includes licensed nutritionists and dietitians, certified health education specialists, as well as certified strength and conditioning specialists, personal trainers and corrective exercise specialists. Our team aims to be not only thorough with its research, but also objective and unbiased.
The information in our articles is NOT intended to replace a one-on-one relationship with a qualified health care professional and is not intended as medical advice.
How to Make Homemade Eczema Cream for Relief
June 6, 2025

Eczema, medically known as atopic dermatitis, affects more than 31 million Americans, causing dry, itchy and inflamed skin. While prescription treatments are available, many individuals seek natural alternatives to manage their symptoms. Crafting your own eczema cream allows you to harness the therapeutic properties of natural ingredients, offering a gentle yet effective solution for skin relief.
The word eczema itself just doesn’t sound good. It comes from a Greek word that means to effervesce, bubble or boil over, and for the roughly 31.6 million people, according to the Eczema Foundation, who suffer from it, they know it doesn’t look or feel good, either.
Luckily, there are several natural treatments for eczema symptoms, and one of the best and most effective is taking advantage of eczema creams. Better yet, make this homemade eczema cream with natural ingredients that come with little to no side effects.
Key ingredients
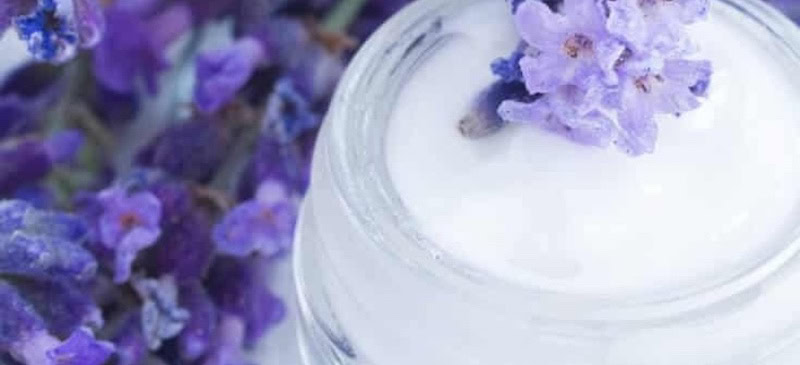
Up your defense against this skin condition with this eczema cream. It features lavender essential oil, which helps relieve the red, dry skin associated with eczema, along with raw shea butter, which is full of all-natural vitamin A, works as an anti-inflammatory and aids in numerous skin conditions.
Here is more on the main players in this DIY eczema cream recipe:
Raw shea butter
Raw shea butter is renowned for its deep moisturizing capabilities. Rich in vitamins A and E, it promotes skin regeneration and provides anti-inflammatory benefits, making it ideal for soothing eczema-prone skin.
Its emollient properties help restore the skin’s barrier, reducing dryness and irritation.
Coconut oil
Coconut oil possesses antimicrobial and anti-inflammatory properties, which can help reduce the risk of skin infections associated with eczema. Its medium-chain fatty acids deeply penetrate the skin, providing lasting hydration and alleviating itchiness.
Honey
Honey, particularly raw and unprocessed, offers natural antibacterial and anti-inflammatory effects. It aids in wound healing and can soothe irritated skin, making it a beneficial addition to eczema treatments.
Lavender essential oil
Lavender essential oil is celebrated for its calming and healing properties. It can reduce redness, alleviate itchiness and promote skin healing, making it a valuable component in eczema care.
Tea tree essential oil
Tea tree oil has potent antiseptic and anti-inflammatory qualities. It can help combat skin infections and reduce inflammation, providing relief from eczema flare-ups.
However, it should be used cautiously, as it may cause irritation in some individuals.
Geranium essential oil
Geranium oil offers anti-inflammatory and antimicrobial benefits. It can assist in balancing skin oils and soothing irritated skin, contributing to the overall effectiveness of an eczema cream.
Myrrh essential oil
Myrrh oil is known for its healing and anti-inflammatory properties. It can help repair damaged skin and reduce inflammation, making it a supportive ingredient in managing eczema symptoms.
You also can add a 1/4 cup of olive oil or almond oil to the 1/2 cup of coconut oil if you choose, but this step is optional.
How to make eczema cream
Here is the equipment you need to make this homemade eczema cream:
- Wide-mouth mason jar or something similar with a lid for storage.
- Double boiler. Another option is to use a heat-safe container that you can place in a pan filled with some water, such as a jar.
- Mixer: hand-held or stand mixer.
Once you gather your supplies and ingredients, you’re ready to get started.
The first step is to melt the shea butter and coconut oil (and the optional almond/olive oil) using the double broiler or similar heating device, stirring them as they melt until they’re well combined. Then add the honey, and keep stirring until it’s melted and blended with the shea butter/coconut oil mixture.
Then add the essential oils, continuing to stir so they blend in to the other ingredients.
Next, cool the mixture slightly so it begins to thicken, but watch it to make sure it stays soft. At this point, you can put it in the refrigerator for a few minutes to speed up the cooling process, but be sure to remove it quickly so it doesn’t harden too much.
After the solution has cooled, mix it for several minutes with a mixer until it has a frothy appearance that resembles the consistency of lotion. Mix it every 10 minutes or so for about a half hour to achieve this consistency.
Transfer it to the mason jar container, and voila, your homemade eczema cream is ready to use!
It’s best to store it at room temperature so it stays soft and is easy to apply, but you can store it in the fridge if you’d like.
How to apply it:
Testing is always advised when using a new product on your skin, especially when using essential oils or products that may contain nuts. Once you have tested, if you want to continue using it, simply apply once or twice a day over the affected area.
Make sure to avoid eye contact and wash hands thoroughly after each use.
Creating your own eczema cream with these natural ingredients can provide soothing relief and support skin health. However, it’s essential to consult with a healthcare professional before starting any new treatment, especially if you have underlying health conditions or are pregnant.
More DIY beauty recipes
If you’re looking for other natural skin care creams and solutions to make at home and add to your skin care routine, here are some DIY recipes to check out:
- Anti-Wrinkle Cream with Ginseng and Rosehip Seed Oil
- DIY Moisturizer for Dry Skin with Lavender Oil
- DIY Face Moisturizer with Shea Butter & Essential Oils
- Grapefruit Cellulite Cream

How to Make Homemade Eczema Cream for Relief
- Total Time: 40 min
- Yield: 25 uses 1x
Description
Crafting your own eczema cream allows you to harness the therapeutic properties of natural ingredients, offering a gentle yet effective solution for skin relief.
Ingredients
- ½ cup raw shea butter
- ½ cup coconut oil (optional: ¼ cup olive oil or almond oil)
- 1 tablespoon local honey
- 30 drops lavender essential oil
- 8 drops tea tree essential oil
- 5 drops geranium essential oil
- 5 drops myrrh essential oil
Instructions
- Using a double boiler or something similar, melt the shea butter and coconut oil until they’re combined.
- Add the honey and continue to stir.
- Once everything has melted and is well blended, add the lavender, geranium, myrrh and tea tree oils. Continue to blend.
- Slightly cool the ingredients so the blend will begin to thicken, but keep it soft. You can put the solution in the refrigerator for a few minutes to speed up this process but not for long. You do not want it to harden too much.
- Using your mixer (either hand-held or a stand mixer), mix for several minutes until it has a frothy appearance, eventually developing the consistency of lotion. You can achieve this by continuing to mix about every 10 minutes.
- Transfer to the mason jar or other container.
- Store at room temperature or in the refrigerator. It will stay a bit softer at room temperature which may make it easier to apply.
Notes
- You can add a 1/4 cup of olive oil or almond oil to the 1/2 cup of coconut oil if you choose, but this step is optional.
- Experiment with other healing essential oils as well.


